
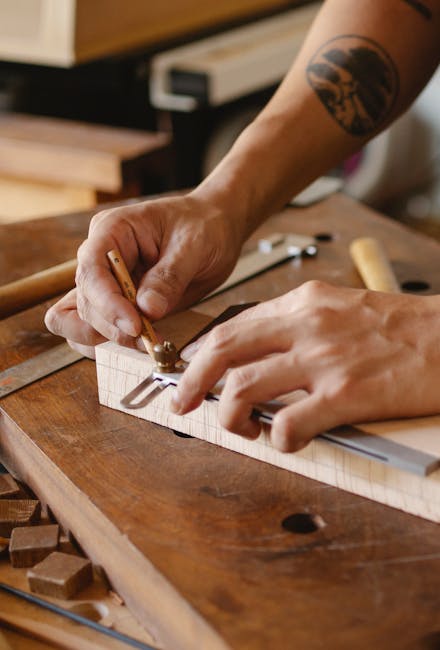
Have you ever looked closely at a piece of wood or metal and noticed unique grooves or scratches? These are tool marks, and they're more than just random imperfections.
Tool marks tell a story. They reveal the history of how an object was shaped, cut, or created. Understanding how these marks are made can give you insight into craftsmanship, manufacturing processes, and even forensic investigations. Imagine being able to decode these marks and uncover the hidden tales behind everyday objects.
We’ll explore the fascinating world of tool marks, showing you how they’re formed and why they matter. Get ready to see the ordinary in an extraordinary new light.
Types Of Tool Marks
Tool marks are fascinating indicators that reveal the story of an object's creation or alteration. Understanding the types of tool marks can deepen your appreciation for forensic investigations, craftsmanship, and historical artifacts. Different tools leave distinct marks, which experts can analyze to identify the tool used and the technique applied. Let's dive into the common types of tool marks: cutting, abrasion, and indentation.
Cutting Marks
Cutting marks are created when a tool slices through a material. Imagine using a knife to cut through a piece of wood; the knife leaves a trace of its path. These marks can vary depending on the sharpness and angle of the blade.
Think about how a chef's knife glides through vegetables, leaving smooth, clean lines. In contrast, a jagged saw might leave rough, uneven edges. Can you recall a time when you struggled with a dull knife? The resulting ragged cut is a classic example of a cutting mark.
Abrasion Marks
Abrasion marks occur when a tool grinds or wears away the surface of a material. Picture sanding wood to smooth its surface. The sandpaper leaves tiny grooves, showcasing its abrasive action.
Even everyday items like sandpaper or a nail file create abrasion marks. Have you ever polished a scratched surface, only to reveal a new texture? That's the magic of abrasion marks at work. How do you think these marks can tell a story about the tool used?
Indentation Marks
Indentation marks are made when a tool presses into a surface, leaving a depression. Imagine pressing a key into clay; the key leaves a distinct outline. These marks provide clues about the tool's shape and size.
Consider the impression left by a hammer striking a nail. The indentation tells you about the force and angle of impact. Have you ever noticed the unique pattern left by your shoe on wet sand? Such marks can be surprisingly informative. What insights could these marks offer in a forensic investigation?
Each type of tool mark offers a glimpse into the interaction between tool and material. Recognizing these marks not only aids in forensic science but also enriches your understanding of everyday objects. Next time you encounter a tool mark, pause and consider the tale it might tell.
Materials And Tools
Tool marks appear when tools press against surfaces, leaving unique impressions. These marks vary based on tool type and surface material. Each tool leaves distinct patterns, helping in identification.
Understanding how tool marks are made requires a keen look at the materials and tools involved in the process. These marks are crucial in fields like forensic science, manufacturing, and even art. Imagine being able to determine the type of tool just by examining the marks it left behind. This is not just about the tools themselves but also about the materials they interact with.
Hard Vs Soft Materials
Materials play a critical role in the type of tool marks produced. Hard materials, like metal or stone, often show more defined and persistent tool marks. If you've ever tried to carve into a piece of marble, you know how each chisel strike leaves a permanent impression. Soft materials, on the other hand, like wood or clay, display tool marks in a more malleable manner. They can be smoothed over or reshaped with ease, but the initial impression still tells a story. Have you noticed how a wooden sculpture reveals the artist's every movement?
Common Tools Used
The tools that create these marks vary widely, from everyday items to specialized equipment. Knives, saws, chisels, and hammers are some of the most common tools that leave distinct marks. A kitchen knife, for instance, leaves a different mark than a serrated bread knife. Think of a carpenter's workshop. Each tool from a simple screwdriver to a complex lathe creates unique patterns. These tools are not just practical; they're storytellers in the hands of skilled users.
Specialized Tool Techniques
Specialized techniques can produce intricate tool marks that are both functional and aesthetic. Engraving, for example, requires precision tools that leave fine, deliberate marks on metal or glass. Consider how jewelers use tiny, sharp tools to carve out delicate designs. This is a meticulous process that blends art with science, each tool mark contributing to the final masterpiece. Have you ever thought about the level of skill required to make these precise marks? It's a fascinating blend of human skill and tool capability. These marks are not just random; they're a testament to the technique and expertise behind them. Understanding these aspects can change how you perceive tool marks in your daily life. Next time you pick up a tool, think about the marks it will leave and the story they might tell.
Process Of Mark Creation
The process of creating tool marks involves several steps. Each step plays a critical role. Understanding these steps helps in forensic analysis. Tool marks provide clues about the tool used. They also tell us how the tool was used. Let's explore the process of mark creation.
Initial Contact
Tool marks begin with initial contact. A tool touches a surface. This contact leaves an impression. The shape of the tool affects the mark. The material of the surface also matters. Initial contact sets the stage for further marking.
Pressure Application
Pressure plays a vital role in mark creation. More pressure means deeper marks. Light pressure leaves shallow marks. The type of tool affects pressure needed. Hard tools require less pressure. Soft tools may need more force. Pressure determines the mark's depth and clarity.
Movement And Direction
Movement creates unique tool marks. A tool moves across a surface. The direction of movement matters. Straight, curved, or diagonal paths create different marks. The speed of movement also affects the mark. Fast movements may blur details. Slow movements offer more precision. Movement and direction give each mark its distinct features.
Factors Influencing Tool Marks
Understanding tool marks requires knowing what affects them. Several factors play a role. These factors can change the way a tool mark appears. Let's explore these factors in detail.
Tool Sharpness
The sharpness of a tool greatly impacts its marks. A sharp tool cuts cleanly. It leaves precise marks on the material. Dull tools make wider marks. They can cause rough edges. Sharp tools need less force. They create clearer impressions. Regular sharpening is important. It keeps tools effective and reliable.
Material Resistance
Different materials resist tools differently. Some are soft, some are hard. Soft materials like wood show deeper marks. Hard materials like metal resist cutting. Tool marks vary based on this resistance. Hard materials require more force. This changes the mark's depth and clarity. Knowing the material is crucial. It helps in predicting tool marks.
User Skill Level
The user's skill level influences tool marks. Experienced users handle tools better. They control pressure and angle. This results in consistent marks. Beginners may struggle with control. This leads to uneven marks. Practice and experience improve skill. They help in achieving precise tool marks.
Analyzing Tool Marks
Tool marks are essential in forensic investigations. They help determine the tools used in a crime. Analyzing these marks reveals important clues. Each tool leaves unique marks. These marks can be studied to identify the tool.
Microscopic Examination
Microscopes reveal the smallest details of tool marks. They show tiny grooves and patterns. These details are invisible to the naked eye. Microscopic examination helps in identifying the specific tool used. It enhances the accuracy of the analysis.
Comparative Analysis
Comparative analysis matches tool marks with suspect tools. Experts compare the marks with known tool patterns. This process is crucial for linking tools to crime scenes. It helps in establishing a connection with the suspect. This method is precise and reliable.
Digital Modeling
Digital modeling creates 3D images of tool marks. It provides a detailed view of the marks. This technology helps in visualizing the marks better. Digital models can be stored for future reference. They are useful in court presentations.
Applications In Forensics
Tool marks play a crucial role in forensic investigations. They provide valuable insights into criminal activities. Forensic experts analyze these marks to identify tools used during crimes. Understanding tool marks aids in solving complex cases. It bridges the gap between crime scene evidence and legal justice.
Crime Scene Investigation
At a crime scene, tool marks serve as vital evidence. Investigators collect these marks to analyze later. They compare them with tools found or suspected. Microscopic examination reveals unique patterns left by tools. These patterns help link a suspect to a crime. It also helps in reconstructing the sequence of events. This process aids in narrowing down suspects.
Legal Implications
Tool marks hold significant weight in courtrooms. They provide concrete evidence against suspects. Expert testimony about tool marks can sway juries. Accurate analysis can lead to convictions. Incorrect analysis can lead to wrongful accusations. Hence, precision in examining tool marks is vital.
Case Studies
Several cases highlight the importance of tool marks. In one case, a crowbar left distinct marks. These marks matched a tool found with the suspect. It resulted in a conviction. Another case involved bolt cutters. The marks were unique to a specific brand. This detail led to the suspect's arrest. Such examples underscore the forensic value of tool marks.
Preservation Of Tool Marks
Tool marks are made when a tool interacts with a surface, leaving unique impressions. These marks help in forensic investigations by showing the tool's characteristics and usage patterns. Preserving these marks involves careful handling and documentation to maintain their integrity for analysis.
Preservation of tool marks is crucial for forensic investigations. These marks can provide vital clues about the tools used in a crime, potentially linking a suspect to the scene. Proper preservation ensures that the evidence remains intact and usable for legal proceedings.
Protective Measures
When handling tool marks, it's essential to minimize direct contact. Use gloves to prevent contamination. Cover the tool mark with a protective material like plastic wrap or a clear cover to shield it from dust and environmental damage. Consider creating a barrier around the tool mark if it's on a larger object. This can be done with tape or a similar material. Protecting the mark ensures that its details remain sharp and clear for analysis.
Documentation Techniques
Thorough documentation is vital. Take high-resolution photographs from multiple angles to capture every detail. A scale should be included in the photos to provide context for the size of the marks. Notes are also crucial. Record the exact location and conditions under which the tool mark was found. This information can be invaluable during a forensic examination.
Long-term Storage
Proper storage is key to preserving tool marks over time. Store items in a stable environment, avoiding extreme temperatures and humidity. Use archival materials that won't degrade or affect the tool mark. Consider creating a digital backup of all documentation. This ensures that even if physical records degrade, the information is still accessible. How can you ensure that your preservation methods stand the test of time?
Frequently Asked Questions
What Are Tool Marks In Forensics?
Tool marks are unique impressions or scratches left on surfaces by tools. They are critical in forensic investigations for identifying and linking tools to crime scenes.
How Do Tool Marks Form?
Tool marks form when a tool makes contact with a surface. The interaction leaves unique patterns or impressions. These can be used to analyze and compare with suspect tools.
What Types Of Tool Marks Exist?
There are two main types: impressed and striated marks. Impressed marks are indentations, while striated marks are scratches. Each type provides valuable forensic information.
How Are Tool Marks Analyzed?
Tool marks are analyzed using comparison microscopes. Forensic experts compare the marks with known tool samples. This helps in identifying the tool used in a crime.
Conclusion
Tool marks tell stories. Each mark reveals important information about the tool used. Understanding these marks helps identify tools and their uses. They assist in solving cases, crafting art, and more. Observing details provides clues about the tool's purpose and history.
Recognizing patterns enhances knowledge about manufacturing processes. Tool marks are everywhere; learning to spot them enriches our understanding. Their presence is important in many fields. Next time you see a mark, think about its origins. Every tool leaves a unique mark.
Explore these stories and gain deeper insights.








