Are you eager to bring your artistic skills to life by drawing everyday objects? Imagine capturing the essence of your favorite gardening tools with just a pencil and paper.
Not only does drawing enhance your creativity, but it also deepens your appreciation for the simple tools that help nurture nature. In this guide, you'll uncover simple techniques to sketch gardening tools with precision and flair. Whether you're a beginner or looking to refine your skills, these tips will make your drawings vibrant and realistic.
Dive in, and discover how drawing can transform the way you view the world around you!
Essential Drawing Materials
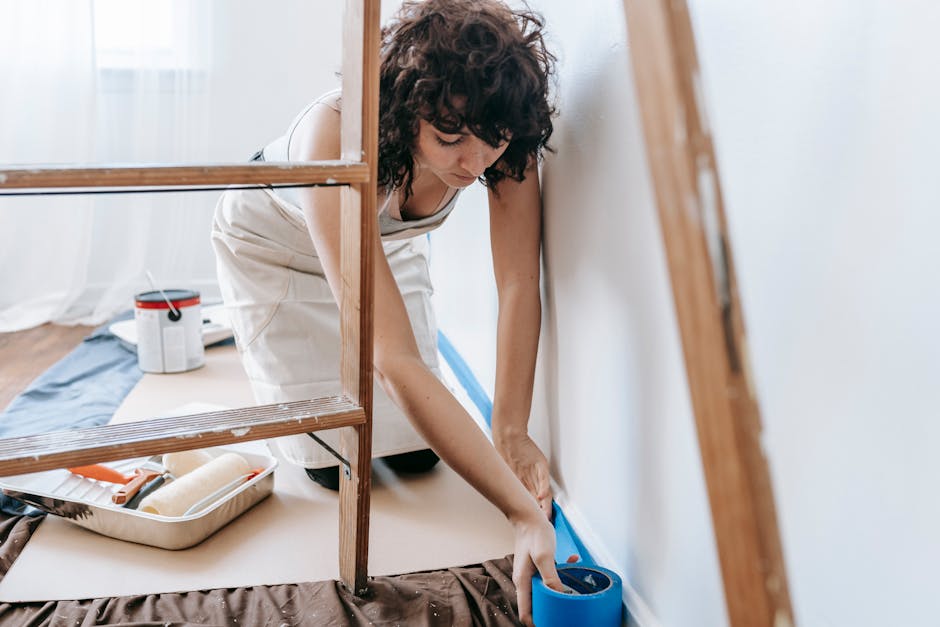
Drawing gardening tools can be a fun and rewarding experience. To begin, you'll need the right materials. Having quality supplies makes the process smoother and more enjoyable. Here, we will explore the essential drawing materials needed for this creative journey. Each tool plays a vital role in bringing your drawings to life.
1. Pencils
Pencils are the foundation of any drawing. Start with a range of graphite pencils, from hard to soft. This variety helps in creating different shades and textures. A good pencil sharpener keeps your pencils ready for detail work.
2. Drawing Paper
Choose a quality drawing paper that can handle erasing and shading. Look for paper with a smooth surface. It ensures your lines are clean and precise. A sketchbook is portable and keeps your work organized.
3. Erasers
Two types of erasers are essential: a kneaded eraser and a plastic eraser. The kneaded eraser is flexible and perfect for lightening areas. The plastic eraser works well for removing dark lines.
4. Ruler And Compass
A ruler ensures straight lines and accurate measurements. A compass helps in drawing perfect circles and arcs. These tools are important for maintaining proportions in your drawings.
5. Colored Pencils
Colored pencils add vibrancy to your gardening tools. Select a set with a wide range of colors. They help in adding realistic details and highlights.
6. Blending Tools
Blending stumps and tortillons are useful for shading. They help create smooth transitions between light and dark areas. These tools add depth to your drawings.
7. Fineliner Pens
Fineliner pens are great for outlining your drawings. They provide a crisp and clean finish. Use different nib sizes for varied line thicknesses.
Basic Drawing Techniques
Drawing gardening tools can be a fun and creative activity. Knowing basic techniques makes it easier and enjoyable. These techniques help you capture the essence of each tool. From spades to watering cans, basic techniques make your drawings come alive. Let's explore these techniques in detail.
Lines And Shapes
Start with simple lines. Use straight lines for handles and curved lines for blades. Shapes are the building blocks. Rectangles for handles, circles for watering cans. Combine these shapes to form each tool. Sketch lightly; this allows easy correction.
Shading And Textures
Shading adds depth. It makes tools look three-dimensional. Use light strokes for shading. Darken areas where light doesn't hit. Textures give realism. Mimic rough surfaces for handles. Smooth textures for metal parts. Experiment with different pencil pressures. This creates varied effects.
Drawing A Shovel
Drawing a shovel is a fun activity for budding artists. It involves simple shapes and lines. With practice, anyone can create a realistic shovel illustration. This guide will help you draw a shovel step by step. Let's start with outlining the blade.
Outlining The Blade
Begin with a simple oval shape for the blade. It should be wide at the top and narrow at the bottom. Ensure the edges are smooth and even. This forms the basic outline of the shovel blade.
Add a curved line at the bottom of the oval. This line represents the cutting edge. It gives the blade a realistic look. Check that the curve is symmetrical on both sides.
Adding The Handle
Draw a straight line extending from the top of the blade. This line forms the handle. Make it long enough to balance the blade size. Ensure the line is straight and firm.
At the end of the line, sketch a small rectangle. This represents the grip part of the handle. It helps complete the shovel's structure.
Detailing And Shading
Add details to make your shovel look realistic. Draw lines to show metal texture on the blade. Use small strokes for depth and dimension.
Next, shade the handle lightly. Use diagonal lines for shadows. This adds a 3D effect to your drawing.
Finally, check your drawing for any rough edges. Smooth them out for a polished look. Your shovel drawing is now complete!
Creating A Rake
Drawing gardening tools begins with simple shapes. Start with an outline for the rake head and handle. Add details like teeth and texture to bring the tool to life.
Creating a rake is an exciting step in your journey to master drawing gardening tools. You might wonder what makes a rake such a unique tool to illustrate. Its distinctive structure, with a wide head and multiple tines, offers an opportunity to practice precision. Capturing its essence can enhance your overall drawing skills. Let's break it down step by step, ensuring each part of the rake stands out with clarity.
Sketching The Head
Start with the head of the rake. Draw a horizontal line to represent the top. This line helps anchor the tines and gives your drawing a solid foundation. A slight curve can add a more realistic touch. Rakes often have a gentle arc to hold leaves better. Remember, the head should be wide enough to accommodate several tines. This sets the stage for the next steps.
Illustrating The Tines
Tines are the teeth of the rake. Draw vertical lines extending down from the head. Ensure they are evenly spaced. This symmetry ensures your rake looks balanced. To add a 3D effect, slightly curve each tine. Imagine how a real rake’s tines look when they dig into the soil.
Finishing The Handle
The handle completes your rake. Start by drawing a long, straight line from the head. Keep the handle proportional to the head. A too-short handle looks odd, while a too-long handle seems unwieldy. Add texture to show the material, like wood grain or metal shine. This detail can make your drawing pop. Reflect on your own gardening experiences. Have you ever noticed how a rake feels in your hand as you clear leaves? That memory can guide your illustration, making it more authentic. Remember, drawing is about observation and practice. Each stroke brings you closer to capturing the rake’s essence. What stories will your rake tell?
Illustrating A Watering Can
Capturing the essence of a watering can begins with basic shapes. Sketch a rounded body and add a spout. Draw the handle gracefully curving over the top.
Illustrating a Watering Can Drawing gardening tools can be a delightful way to merge your love for art and nature. Among these tools, the watering can stands out with its unique design. Its curved spout and sturdy handle make it both functional and elegant. Whether you're an aspiring artist or just doodling for fun, capturing the essence of a watering can can be both a challenge and a joy.
Forming The Body
Start by sketching an oval shape for the body of the watering can. Picture it as a slightly flattened cylinder. This shape will serve as the main container that holds water. Ensure the bottom of the oval is flat. This gives it a realistic base to rest on. You might want to add a faint line at the bottom to indicate the ground. Think about the size. A larger body suggests a bigger capacity, while a smaller one might look more delicate.
Designing The Spout
The spout is what makes the watering can distinctive. Draw a thin, elongated shape protruding from the body. It should curve slightly upwards. Consider how water flows. The spout should have a gentle curve to suggest water gracefully pouring out. Add small details like the nozzle at the end. This tiny detail can make your drawing come to life.
Adding The Handle
The handle is crucial for both functionality and aesthetics. Sketch a semi-circular shape on top of the body. It should connect at two points, creating a sturdy grip. Think about how you'd hold it. The handle should be big enough for a comfortable grip. Experiment with different styles. A straight handle gives a modern look, while a curved one adds a vintage feel. Drawing a watering can can be a rewarding experience. It challenges your creativity and attention to detail. As you progress, ask yourself, what story does your watering can tell?
Designing A Trowel
Creating a trowel drawing can be a fun artistic activity. This tool is essential in gardening for digging and planting. Learning to draw it involves focusing on its unique features. Follow these steps to capture the trowel's essence.
Drawing The Blade
Start by sketching a curved triangle shape. The blade's outline should be smooth and pointed. Add a slight curve for a realistic look. Make sure the blade is slightly wider near the handle. This gives the trowel its distinctive shape.
Crafting The Grip
The grip is usually cylindrical. Draw two parallel lines extending from the blade. These lines form the handle. Curve the ends slightly for a natural feel. Add a cross-line at the handle's end. This represents the grip cap.
Enhancing With Details
Details bring your drawing to life. Add texture to the blade with light shading. Sketch lines to suggest metal shine. For the handle, draw small lines to show wood grain. These lines add depth and realism. Consider adding a brand logo for authenticity.
Capturing A Hoe
Drawing gardening tools can be fun and easy. Focus on the hoe's simple shapes and lines. Capture its long handle and angled blade. Use basic forms to bring this essential gardening tool to life on paper.
Capturing the essence of a hoe in your drawings can be rewarding. This garden tool has a simple yet distinct design. Understanding its components helps in accurately representing it on paper. Let's break it down into manageable steps.
Constructing The Blade
Begin with the blade. It is typically triangular. Draw a straight line to form the top edge. Then, sketch the sides slightly angled downwards. Connect these lines to create the pointed tip. Ensure the angles look balanced for realism. The blade should appear sharp and sturdy.
Shaping The Shaft
Next, focus on the shaft. It is usually long and straight. Start by drawing two parallel lines. These lines should extend from the blade. Keep them evenly spaced to maintain proportion. The shaft connects the user's hand to the blade. It should look firm and supportive.
Detailing Features
Add details for a lifelike appearance. Sketch bolts or screws where the blade meets the shaft. These small elements enhance authenticity. Consider drawing grain lines on the shaft. They mimic wood texture and add depth. Finally, refine any rough edges for a polished finish.
Artistic Tips And Tricks
Discover creative ways to draw gardening tools with ease. Capture the essence of trowels, shovels, and rakes using simple lines and shading. Enhance your artistic skills by focusing on details like tool shapes and textures.
Drawing gardening tools can be a delightful journey into the world of art. Whether you're a beginner or someone who's been sketching for years, there's always room to improve your skills. Artistic tips and tricks can transform your sketches, making them more lifelike and engaging. Let's dive into some practical advice to enhance your drawings of gardening tools.
Using Reference Images
Reference images are your best friend when drawing. They provide a real-world guide to shapes, shadows, and details. Use images from gardening catalogs or online resources to understand the intricate parts of each tool. Notice how light interacts with the metal of a spade or the wood grain of a rake handle. These details can add depth and realism to your sketches. Have you ever considered using your own garden as a reference? Taking photos of your tools in various lighting can be a fun and insightful exercise.
Experimenting With Styles
Art is about expression, and your style is your unique signature. Try different styles to see what resonates with you. Maybe a minimalist line drawing captures your interest, or a detailed, shaded style feels more authentic. Experimenting with styles can also help you discover new techniques. You might find that watercolor adds a touch of softness to your sketches, or that a bold pen outline gives a modern twist. What style speaks to you when you think about gardening tools? Trying new styles also keeps your art fresh and exciting. It challenges you and prevents your work from feeling stagnant. Remember, your drawing journey is personal, and there are no wrong answers. Incorporating these artistic tips and tricks into your practice can elevate your drawings from simple sketches to captivating pieces of art. With each tool you draw, you'll find new ways to express your creativity and enhance your skills. What will your next masterpiece be?
Frequently Asked Questions
What Tools Are Essential For Garden Drawing?
To draw gardening tools, start with essentials like a spade, trowel, and rake. Use simple shapes like rectangles and triangles. Focus on details like handles and blades to make them recognizable. Sketch lightly first, then add details and shading for depth.
How Do You Sketch A Garden Spade?
Begin with the handle, a long rectangle, then draw the blade as a curved triangle. Add shading to create depth and texture. Pay attention to proportions for a realistic look. Use light strokes for initial sketches, then darken important lines.
What Is The Best Way To Draw A Rake?
Draw the handle as a long, straight line. The rake head is a rectangle with evenly spaced, thin lines for tines. Focus on symmetry and proportion. Lightly sketch first, then add details like texture and shading for a realistic appearance.
How To Add Details To Garden Tools Drawing?
Start by observing real tools for details like screws, grips, and textures. Use shading to add depth and highlight these features. Focus on light and shadows to make the drawing more realistic. Layering pencil strokes can create texture and enhance details.
Conclusion
Drawing gardening tools is a fun and creative activity. It helps improve your sketching skills. Simple lines and shapes can form complex tools. Practice regularly to get better. Use these tips to enhance your drawings. Enjoy the process and see your progress.
Remember, each sketch is unique. Share your artwork with friends and family. Inspire others to start drawing too. Gardening tools make great subjects for art. Keep experimenting with different styles. Happy drawing!