
Ever found yourself rummaging through a cluttered toolbox, trying to find that one elusive wrench? Or perhaps you've lent out a screwdriver, only to never see it again?
Marking your hand tools can transform your workshop chaos into an organized haven. Not only does it help you keep track of your own tools, but it also deters others from accidentally—or intentionally—walking away with them. Imagine the peace of mind knowing that every tool has a designated spot and a distinct mark that screams, "This is yours!" By the end of this article, you'll discover simple yet effective methods to mark your hand tools, ensuring you never lose track of your essentials again.
Dive in and reclaim control over your workspace.
Why Marking Tools Matters
Marking your hand tools might seem trivial. It's quite essential. Imagine working on a project. You reach for a screwdriver. It's not yours. Now you waste time searching. Marking tools saves time and stress. It also prevents theft. Let's explore why marking tools matters.
Ownership is clear when tools are marked. No confusion. No mix-ups. This is crucial in shared spaces. Workshops, garages, or job sites. Everyone knows which tools belong to whom. This reduces accidental borrowing.
Marking tools also deters theft. A marked tool is harder to resell. Thieves are less likely to take it. They know it’s traceable. This keeps your tools safe.
Organization improves with marked tools. You can categorize them easily. By size, type, or use. This makes your work efficient. You spend less time searching. More time doing what you enjoy.
Improved Productivity
Time is precious. Marked tools save time. You know exactly where they are. No more searching. This boosts productivity. You finish projects faster.
Imagine a busy workshop. Tools scattered everywhere. Marked tools stand out. You grab them quickly. You stay on track. Projects get completed on time.
Cost-effective
Losing tools can be expensive. Marking them prevents loss. You save money. There's no need to replace lost tools. Your budget stays intact.
Marked tools are also durable. The marks withstand wear and tear. Your investment lasts longer. This is financially smart.
Choosing The Right Marking Method
Choosing the right method to mark your hand tools can make a significant difference in their longevity and organization. Whether you're looking to permanently label your tools or prefer a temporary solution for easy identification, understanding your options is crucial. This decision can affect not only the durability of the marking but also the overall efficiency of your workflow. How do you ensure your tools remain identifiable yet protected from wear and tear?
Permanent Marking Options
If you're looking for something that stands the test of time, permanent markings are your best bet. One popular method is engraving. It cuts directly into the tool's surface, ensuring the mark won't fade or peel off. Using an engraving pen, you can etch your name or initials onto metal surfaces easily.
Another durable option is using a metal stamping kit. This involves hammering letters and numbers into the tool's surface. It's a simple yet effective way to create lasting impressions on your tools. However, be cautious with delicate tools as this method might cause slight deformation.
Have you tried using a paint marker? These are specially formulated to adhere to metal surfaces and withstand heavy usage. With a variety of colors available, paint markers allow for easy customization. A quick tip: choose a contrasting color to ensure visibility.
Temporary Marking Solutions
For those who prefer flexibility, temporary marking solutions offer great versatility. Masking tape is an excellent choice for short-term labeling. Simply write on the tape and stick it to your tool. It's easy to remove and replace whenever needed.
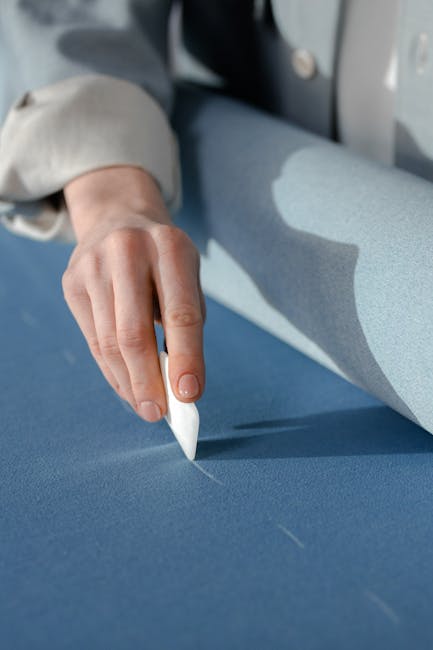
Consider using chalk for marking. This is especially useful in workshops where tools are frequently shared. Chalk marks are easy to apply and wipe off, making them ideal for dynamic environments.
Have you explored the use of labels? Adhesive labels can be printed or written on, providing a quick and neat way to tag your tools. Although not as durable as permanent options, they’re perfect for temporary identification needs.
Choosing the right marking method can greatly affect your tool management experience. What method fits your needs best? Experiment with different techniques to find what works for you. Remember, the key is to enhance both the organization and longevity of your tools.
Tools And Materials Needed
To mark your hand tools, gather permanent markers, labels, engraving tools, and protective gloves. Ensure each tool is clean and dry before marking. These materials help you keep track of your tools efficiently.
When it comes to marking your hand tools, having the right tools and materials is essential for a successful and long-lasting result. You don't want your markings to fade or become unreadable after just a few uses. Choosing the right materials can save time and frustration down the line. You might wonder, what exactly do you need to get started?
Permanent Markers
Permanent markers are a quick and easy solution for marking your tools. They come in a variety of colors, so you can color-code your tools if needed. Make sure you choose a marker that is water and fade-resistant. This way, the markings will withstand the wear and tear of regular use. Have you ever found a marker that faded after the first rain? Choosing the right one can make all the difference.
Engraving Tools
Engraving tools offer a more permanent solution. These tools can carve your name or initials directly into the metal or plastic of your hand tools. They're particularly useful for marking expensive or frequently misplaced tools. If you've ever lost a tool and wished it had your name on it, engraving might be the way to go. Plus, it's a satisfying process to see your name etched in steel.
Label Makers
Label makers are perfect for those who prefer a neat and uniform look. They create stickers that can be applied to your tools. While not as permanent as engraving, they offer flexibility and are easy to read. If you've ever struggled to read your own handwriting after a rushed job, a label maker can bring clarity. It also allows you to change labels as needed without much hassle.
Clear Nail Polish
Using clear nail polish is a clever hack to seal your markings and make them last longer. Applying a coat over your marker or label helps protect it from smudging or washing away. It's a simple step that can extend the life of your markings significantly. Have you ever smudged a marking just by handling a tool? A quick coat of nail polish can prevent that.
Masking Tape
Masking tape is an excellent option for temporary markings. You can write directly on the tape and remove it when no longer needed. It's particularly useful for tools that are borrowed or used infrequently. Have you ever needed to mark a tool temporarily for a project? Masking tape is your friend in those situations.
Protective Gloves
Always consider safety when working with engraving tools. Protective gloves can prevent injuries and ensure a steady hand during the process. They also keep your hands clean when using markers or nail polish. Safety should never be overlooked, especially with sharp tools. Have you ever tried engraving without gloves and regretted it? A little protection goes a long way. By gathering these tools and materials, you set yourself up for effective and lasting tool marking. Each option has its strengths, so think about what suits your needs best. What tools and materials will you choose to mark your hand tools?
Step-by-step Marking Guide
Discover how to mark hand tools effectively with this simple guide. Learn easy steps to identify and organize tools. Keep your workspace tidy and tools easily accessible with personalized markings.
Marking your hand tools not only helps you easily identify them but also prevents them from getting mixed up with others. Whether you're a DIY enthusiast or a professional tradesperson, knowing which tools belong to you can save time and reduce stress. Let's walk through a simple, step-by-step guide on how to mark your hand tools effectively.
Preparing Your Tools
Before marking, ensure your tools are clean. Dirt and grease can prevent the markings from sticking or showing up clearly. Wipe each tool with a clean cloth and, if necessary, use a mild cleaner to remove stubborn grime. Next, decide on your marking method. Will you use paint, stickers, or an engraving tool? Each has its pros and cons. Paint is visible but may wear off, while engraving is permanent but requires a special tool. Choose the method that suits your needs and resources.
Applying Marks Effectively
Once your tools are clean and you've chosen your method, it's time to apply the marks. If you're using paint, opt for a bright color that stands out against the tool's surface. A small brush can help you apply the paint precisely, ensuring it doesn't smudge. For stickers, make sure they're durable and weather-resistant, particularly if you work outdoors. Apply them smoothly to avoid air bubbles, which can cause them to peel off over time. Engraving might seem daunting, but it's straightforward with the right tool. Practice on a scrap piece of metal first. Engrave your initials or a unique symbol in an inconspicuous spot on the tool. This ensures your tools are marked without affecting their functionality. Have you ever lost a tool because it looked just like everyone else's? Taking a few minutes to mark your tools can prevent such hassles. Plus, it's satisfying to see your personal touch on your gear. Have you thought about what method you'll choose for marking your tools?
Creative Marking Ideas
Labeling hand tools can be simple and effective. Use paint pens for a colorful touch. Engraving adds a personal and permanent mark. Tape and stickers offer an easy and quick solution.
Have you ever found yourself frustrated because you couldn't identify your own hand tools at a glance? With so many tools looking alike, it’s easy to mix them up or even lose them. Creative marking ideas can be your solution, helping you to not only keep track of your tools but also to add a touch of personality and uniqueness to them. Let’s dive into some fun and effective ways to mark your hand tools.
Using Colors And Patterns
Adding colors and patterns to your tools is a simple yet effective method to mark them. Consider using bright, bold colors that stand out. You can use nail polish, permanent markers, or even colored tape. Why not apply a stripe pattern or polka dots to differentiate similar tools? If you have kids, involve them in the process—it can be a fun, bonding activity. Plus, having tools marked with vibrant patterns can make your workspace more cheerful and organized. You might want to ask yourself: What colors or patterns will make my tools easily identifiable yet still appealing to the eye?
Personalized Engravings
Engraving your tools adds a personal touch that’s hard to miss. It’s a durable method that withstands wear and tear. You can engrave your name, initials, or even a short phrase that means something to you. If you own a simple engraving tool, you can do it at home. If not, many local hardware stores offer engraving services at reasonable prices. Engraving doesn’t only help in identifying your tools—it also discourages theft, as engraved tools are harder to resell. Consider this: What unique engraving would make your tools unmistakably yours? By creatively marking your tools, you can ensure they remain yours and reflect your personality. Whether through vibrant colors or unique engravings, these methods offer practical solutions to a common problem. So, are you ready to transform your toolset?
Maintaining Marked Tools
Maintaining your marked tools ensures their longevity and functionality. Regular care prevents wear and tear. It also keeps your identification marks visible. This guide shares simple steps for upkeep. Follow these practices to keep your tools in top condition.
Regular Inspection Tips
Inspect your tools weekly. Check for fading marks. Look for scratches or dirt on the surface. Clean them gently with a soft cloth. Avoid harsh chemicals which can damage marks. Regular checks keep your tools in good shape.
Reapplication Techniques
Marks can fade over time. Reapply them as needed. Use a fine-tip permanent marker for precision. Consider engravers for metal tools. For wooden tools, use paint pens. Ensure the surface is clean before reapplying marks. Let the marks dry completely to avoid smudging.
Avoiding Common Mistakes
Marking hand tools prevents loss and confusion. Many people make mistakes while marking tools. Avoid these mistakes for effective tool identification. This section will help you learn how to mark tools without errors. Follow these tips to ensure your tools are marked correctly.
1. Using Permanent Markers Incorrectly
Permanent markers are popular for tool marking. Some markers fade on rough surfaces. Choose markers designed for metal or plastic. Test markers on a small area first. Ensure the ink stays visible.
2. Ignoring The Surface Material
Every tool surface is different. Metal, plastic, and wood require different marking methods. Use suitable markers or engraving tools. Consider tool material before marking. This prevents fading or peeling.
3. Overcomplicating Marking Designs
Simple marks work best. Complex designs can confuse. Stick to initials or basic symbols. Avoid intricate patterns. Keep it clear and straightforward.
4. Forgetting To Clean Tools First
Dirt can ruin your markings. Clean tools thoroughly before marking. Use a cloth or mild cleaner. Ensure surfaces are dry and clean. This helps marks last longer.
5. Not Checking For Visibility
Visibility is crucial. Ensure your marks are easy to see. Use contrasting colors for better visibility. Choose a spot that's not obstructed. Check marks in different lighting.
6. Choosing The Wrong Size
Size matters in tool marking. Too small marks are hard to read. Too large marks can get damaged. Find a balance between size and readability. Test mark size on scrap material.
Frequently Asked Questions
How Can I Label My Hand Tools?
You can label your hand tools using permanent markers, etching tools, or adhesive labels. These methods ensure easy identification and organization. Opt for durable materials to withstand wear and tear. Custom labels can also include names or color codes for quick recognition.
What Tools Are Best For Tool Marking?
Permanent markers, engraving pens, and adhesive labels are excellent for tool marking. They provide durable and clear identification. Choose a method based on your tool material and personal preference. Engraving offers a more permanent solution, while markers and labels are quick and versatile.
Why Should I Mark My Hand Tools?
Marking hand tools helps prevent loss and mix-ups, especially in shared workspaces. It enhances organization and efficiency by allowing easy identification. Personalized tools also deter theft and can be quickly reclaimed if misplaced. Proper marking can save time and reduce replacement costs.
Can I Use Color Coding For Tool Marking?
Yes, color coding is an effective tool marking method. It allows quick identification and categorization of tools. Assign specific colors to different tool types or ownership. This method simplifies sorting and enhances organization in workshops, making it easy to find and return tools.
Conclusion
Marking hand tools is simple and valuable. It saves time and prevents mix-ups. Use bright colors or durable stickers. Choose methods that suit your needs. Permanent markers work well for quick labeling. Etching is ideal for metal tools. Personalizing tools adds a touch of identity.
Keep your workspace organized. Labeled tools are easy to spot. No more searching! Enjoy efficient work sessions. Share your tips with friends. Help them keep track too. Start marking today. Improve your tool management. Make your projects smoother and more enjoyable.








