Imagine standing in front of your very own log cabin, surrounded by the whispering woods and the comforting scent of fresh timber. The idea of building a log cabin with just hand tools might seem daunting at first, but it's a journey that connects you deeply with nature and your own capabilities.
You might think it's impossible, but with the right guidance and a bit of determination, you can create something truly remarkable. In this guide, you'll discover the step-by-step process to craft a sturdy, cozy retreat using only hand tools. Feel the anticipation of crafting each log, knowing that your effort will lead to a fulfilling escape from the hustle and bustle of daily life.
Are you ready to turn your dream into reality? Let's get started on this rewarding adventure.
Choosing The Right Location
Select a sunny spot with good drainage for your log cabin. Ensure access to resources like water and wood. Consider factors like wind direction to maintain comfort inside.
Choosing the right location is crucial when building a log cabin. The perfect spot ensures comfort and safety. It also enhances the cabin's beauty. A well-chosen location blends with nature. It offers a serene environment for relaxation. Let's explore key factors in selecting the ideal site.
Assessing The Land
Check the land's stability before starting construction. Avoid areas prone to flooding or landslides. Look for a flat or gently sloped surface. This helps with drainage and reduces construction challenges. Soil type matters too. Firm soil supports the cabin better. Avoid sandy or loose soil. It may not hold the structure well.
Considering Sunlight And Wind
Sunlight affects the cabin's warmth and lighting. Choose a site with good sunlight exposure. South-facing slopes get more sunlight. They keep the cabin warm in winter. Consider wind direction as well. Strong winds can cool the cabin quickly. Natural windbreaks like trees offer protection. They help maintain a cozy interior.
Accessibility And Proximity To Resources
Ensure the location is accessible. A nearby road or path is helpful. It makes transporting materials easier. Consider the distance to essential resources. Water sources are vital for daily needs. Nearby forests provide timber for construction. Proximity to town or suppliers can be beneficial. It saves time and effort during building.
Planning The Design
Designing a log cabin with hand tools requires careful planning. Sketch your cabin layout, considering space and sunlight. Choose suitable logs, ensuring they fit your design needs.
Building a log cabin with hand tools is a rewarding project that requires careful planning. The design phase is crucial to ensure your cabin is both functional and aesthetically pleasing. It's not just about putting logs together; it's about creating a space that suits your needs and reflects your personality. Let's dive into the key aspects of planning your cabin design.
Deciding On Size And Layout
When deciding on the size and layout of your log cabin, think about how you will use the space. Are you looking for a cozy retreat or a spacious home? Measure your available land and visualize the cabin's footprint. A smaller cabin can be easier to maintain, while a larger one offers more living space. Consider the number of rooms you need. Will you have separate areas for sleeping, cooking, and relaxing? Draw a simple sketch to see how the rooms will connect.
Selecting The Log Type
The type of logs you choose impacts both the cabin's appearance and durability. Pine logs are popular for their ease of use, while cedar offers natural resistance to decay. Think about the climate of your location. In humid areas, rot-resistant logs like cypress can be beneficial. Visit local suppliers to see what's available. Handling the logs can give you a sense of their weight and texture, crucial for hand tool construction.
Drafting Blueprints
Creating blueprints helps turn your ideas into a workable plan. Start by sketching your design on grid paper. This helps you visualize dimensions accurately. Include details like door and window placements. These elements affect both the cabin's look and its functionality. Consider using software to refine your sketches. Even simple programs can help you adjust dimensions and check for structural integrity. In planning your log cabin design, each decision builds the foundation for your dream retreat. How will your choices reflect the lifestyle you envision?
Gathering Essential Tools
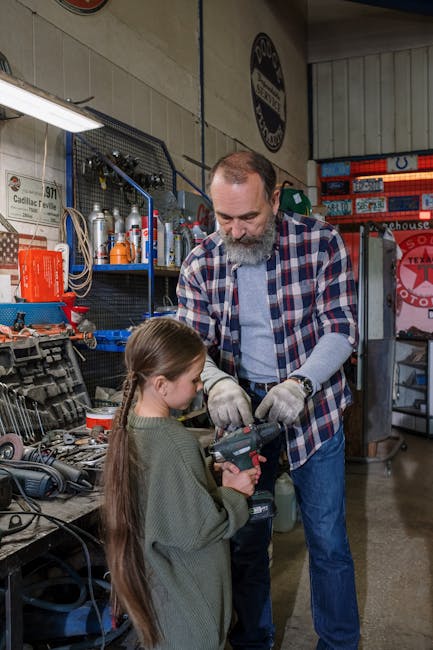
Building a log cabin with hand tools is a rewarding adventure that connects you to the craftsmanship of the past. But before you start, you need to gather the right tools to make your work efficient and enjoyable. Whether it's chopping logs or shaping wooden joints, each tool in your kit serves a unique purpose. Let's break down the essentials, starting with axes and saws, chisels and planes, and measuring and marking tools.
Axes And Saws
Your axe is more than just a cutting tool; it's an extension of your arm. A sharp, sturdy axe will help you fell trees and shape logs with precision. Consider investing in a quality felling axe for cutting down trees and a broad axe for squaring logs.
Saws are equally vital. A crosscut saw, with its large teeth, is perfect for slicing through the wood swiftly. A bow saw or a hand saw might be handy for smaller cuts. Ever tried cutting a log with a dull saw? It's a workout you wouldn't want to repeat!
Chisels And Planes
Chisels are your best friends for carving intricate joints and notches. They come in various sizes, so keep a set handy. A sharp chisel makes all the difference in achieving clean cuts.
Planes, on the other hand, are essential for smoothing surfaces and shaping wood. A good block plane can turn rough timber into smooth surfaces. Remember, the smoother the wood, the tighter the fit!
Measuring And Marking Tools
Accuracy is key when building a log cabin. A reliable measuring tape and a square are must-haves. They ensure your logs are cut to the right length and your angles are precise.
Marking tools like pencils or chalk will help you outline cuts on the wood. Ever wondered why some cabins stand strong for decades? It often boils down to precise measurements and markings.
Gathering these essential tools is the first step in your log cabin journey. Each tool has its role, and when used correctly, they bring your cabin dream to life. What tools will you choose to get started?
Preparing The Logs
Selecting the right logs is crucial for building a sturdy cabin. Choose straight, dry logs without signs of rot. Stripping bark ensures longevity, while notching ensures tight fits and stability.
Building a log cabin with hand tools is a rewarding journey that connects you with nature and craftsmanship. One of the crucial steps in this process is preparing the logs. This involves several stages that ensure your logs are ready for construction. Each step requires care and precision, but with the right techniques, you can transform raw timber into sturdy building materials. Let’s dive into the essentials of preparing your logs for building your dream log cabin.
Felling And Limbs Removal
Before you can build, you need to choose and fell the right trees. Look for straight logs with minimal knots, as they will be easier to work with. Use a sharp axe or saw for felling to ensure a clean cut. Once the tree is down, remove the limbs carefully. A well-sharpened axe makes this task quicker and safer. Have you ever wondered why lumberjacks use specific angles? It’s all about balance and efficiency.
Peeling And Drying Logs
Peeling the bark off your logs helps prevent rot and insect infestation. A drawknife is your best friend here. It’s a simple tool, but remarkably effective for this task. Peel the logs as soon as possible after felling. Freshly cut logs are easier to peel. Place your logs in a dry area to air dry, reducing moisture content and preventing future warping. Drying takes time, often several months, depending on your climate. Patience is key here. Have you considered how the drying process varies with seasons? Understanding this can improve your results.
Cutting Logs To Length
With your logs peeled and dried, it’s time to cut them to the desired length. Measure twice, cut once is a golden rule that saves time and resources. Use a handsaw for precision. It might take more effort than a power tool, but the satisfaction is unparalleled. Consider the size of your cabin and mark the logs accordingly. Remember, the length and fit of your logs will impact the stability and appearance of your cabin. Are you ready to see your vision take shape with each cut you make? By following these steps, you’re on your way to creating a cabin that stands the test of time.
Constructing The Foundation
Building a log cabin with hand tools is a rewarding endeavor that connects you to nature and tradition. A crucial step in this journey is constructing the foundation. Without a solid foundation, the cabin won't stand the test of time. The foundation is where your cabin's strength and longevity begin. Let's explore the essential steps to ensure your cabin’s foundation is built to last.
Site Clearing And Leveling
The first step is choosing the right spot for your cabin. Look for a location that is elevated to prevent water accumulation. Clear the area of rocks, trees, and debris. This is where your hand tools come into play. Use a shovel, axe, and rake to remove obstacles and create a clean slate.
Once the site is cleared, leveling is key. A level foundation ensures structural stability. Use a simple spirit level to check for evenness. Adjust the ground by adding or removing soil where necessary. This attention to detail pays off in the long run, preventing shifts and cracks in your cabin.
Laying The Foundation Logs
With a leveled site, it's time to lay the foundation logs. Choose logs that are robust and resistant to rot. Cedar and pine are popular choices. Cut the logs to the desired length using a handsaw. Ensure each log is uniform in size for a balanced foundation.
Place the logs in a rectangular shape, aligning them carefully. It’s vital to leave no gaps between the logs to maintain stability. Consider using a chisel to create notches in the logs. These notches help the logs fit snugly together, enhancing the foundation’s strength.
Securing The Base Structure
Once the foundation logs are in place, securing them is the next step. This is where your craftsmanship shines. Use wooden stakes and hammer them into the ground at each corner of the foundation. This prevents the logs from shifting over time.
Think about how weather impacts your cabin. To reinforce the structure, consider adding cross beams for added support. This simple addition can make a significant difference in your cabin’s durability. Are you prepared for the challenges nature might throw your way?
As you secure the base, imagine the satisfaction of knowing your cabin will stand firm. With each hammer strike, you’re building not just a cabin but a legacy. Your dedication to detail in this stage sets the tone for the rest of your build.
Constructing a log cabin foundation with hand tools is more than a task; it's a craft that connects you to nature’s rhythms. Are you ready to lay the groundwork for your rustic retreat?
Building The Walls
Crafting a log cabin with hand tools involves precise techniques and patience. Start by selecting sturdy logs for the walls. Carefully notch each log to ensure a snug fit, creating a strong and rustic structure.
Building the walls of a log cabin with hand tools is a rewarding challenge. It requires patience and skill. Each log must fit snugly to create strong, weatherproof walls. This section will guide you through essential techniques for constructing these walls. Let's explore how to notch corners, stack logs, and insulate between them.
Corner Notching Techniques
Corner notching is crucial for a stable cabin. It connects logs securely at corners. The most popular techniques are saddle notch and dovetail. Saddle notch involves cutting a U-shape into the log. This allows logs to sit on top of each other snugly. Dovetail notches are angular and interlock tightly. Both methods require precision. Use a hand saw and chisel for accuracy. The right notch prevents the logs from shifting.
Stacking Logs Properly
Proper stacking ensures stability and alignment. Begin with the largest logs at the base. This creates a strong foundation. Alternate the direction of logs to distribute weight evenly. Use a level to keep each log straight. Adjust logs with a mallet if needed. Consistent log stacking prevents uneven walls. It also reduces gaps and potential drafts.
Insulating Between Logs
Insulating between logs is essential for warmth. Chinking fills gaps and prevents air leaks. Traditional chinking uses moss or clay. Apply it while stacking the logs. For modern insulation, use a foam or caulk. Ensure the insulation material is weather-resistant. This step enhances comfort and energy efficiency. Proper insulation also protects against moisture.
Installing The Roof
Crafting a log cabin with hand tools requires careful roof installation. Secure logs together tightly for stability and weather protection. Maintain precision to ensure a snug fit, providing shelter from the elements.
Building a log cabin is a rewarding journey, and installing the roof is a critical milestone that marks the transition from a structure to a home. The roof protects you from the elements and adds to the aesthetic of your log cabin. Using hand tools to construct the roof is not only possible but also deeply satisfying. Let’s walk through the steps to ensure your roof is sturdy and visually appealing.
Choosing The Roof Style
Before diving into construction, selecting the right roof style is crucial. A-frame, gable, or shed roofs each offer unique benefits. Consider the climate and the aesthetic you wish to achieve. In snowy regions, steep-pitched roofs allow snow to slide off easily, reducing weight on the structure. On the other hand, a flat or slightly sloped roof might be sufficient for areas with mild weather. Which style resonates with your vision for your cabin?
Rafters And Purlins Installation
Once you've chosen a style, it's time to focus on rafters and purlins. Rafters are the backbone, supporting the entire roof. They should be strong and evenly spaced. Using a handsaw, cut the rafters to the appropriate length and angle. Secure them firmly to the top logs of your cabin. Purlins run perpendicular to the rafters, offering additional support. They distribute weight evenly and help in attaching the roofing material. This stage requires precision and patience. What challenges might you face, and how will you overcome them?
Adding Roofing Material
With the rafters and purlins in place, it's time to add the roofing material. Hand tools can efficiently manage materials like wooden shingles or corrugated metal sheets. Begin at the bottom and work your way up. Overlapping each layer ensures water flows off the roof without seeping through. Remember to secure each piece firmly. A hammer and nails will become your best friends in this process. Are you prepared to see your cabin take its final form? Building a log cabin roof with hand tools is a test of skill and resilience. But with each nail hammered and shingle placed, you’re not just building a roof; you’re crafting a legacy. How will you feel when you look up and see your handiwork standing strong against the sky?
Constructing Windows And Doors
Building a log cabin with hand tools involves creating sturdy windows and doors. Carefully crafted openings enhance structural integrity and aesthetic appeal. Essential for ensuring durability and functionality, these elements contribute to a cozy and practical living space.
Constructing windows and doors for your log cabin using hand tools is both challenging and rewarding. It adds character and functionality, transforming your rustic haven into a cozy retreat. Imagine the satisfaction of opening a window that you crafted yourself, feeling the breeze on your face.
Framing Openings
Begin with precise measurements. It's critical to ensure your window and door openings are square and level. Use a spirit level and a carpenter’s square to guide you. Next, cut the logs carefully to create clean, even edges. This step is vital for a snug fit and proper insulation. Make sure the openings are slightly larger than the frames to allow for seasonal wood expansion. Think about ventilation and light. Where do you want sunlight to pour in? Consider this when deciding on the number and placement of windows and doors.
Crafting Window And Door Frames
Select durable wood for your frames. Cedar and pine are great choices for their resilience and aesthetics. These materials are also easier to work with hand tools. Cut the wood to size using a handsaw. Ensure the joints are tight and secure. A well-crafted frame should enhance the cabin's structural integrity. Sand the edges for a smooth finish. This not only improves appearance but also prevents accidental splinters. Add a protective coat to guard against moisture and insects.
Hanging Doors And Windows
Use sturdy hinges for doors and windows. The weight of wooden doors and frames requires robust hardware. Secure them properly to avoid sagging over time. Test the fit before final installation. Do the windows open easily? Does the door swing without resistance? Adjust as necessary to ensure seamless operation. Finally, seal the gaps. Use weatherstripping or caulk to keep drafts and moisture at bay. This step is crucial for energy efficiency and comfort. Building a log cabin with hand tools requires patience and precision. How will you personalize your space with your unique touch?
Interior Finishing Touches
Completing your log cabin with hand tools is a rewarding journey. The interior finishing touches bring warmth and personality to your space. This final phase showcases your creativity and style. Let's explore some key elements in interior finishing.
Flooring Options
The right flooring transforms your log cabin's vibe. Hardwood floors are durable and classic. Pine or oak are popular choices. They offer a rustic charm. Consider sanding for a smooth finish. Seal the wood to protect it from moisture. For a cozy feel, add area rugs. They provide warmth and color to the floor.
Adding A Fireplace
A fireplace is the heart of a log cabin. It provides warmth and a focal point. Choose a stone or brick design for a natural look. Use local materials if possible. A wood-burning stove is another option. It is efficient and easy to maintain. Ensure proper ventilation to keep the cabin safe.
Log Cabin Furniture
Furniture brings comfort to your log cabin. Opt for handmade wooden pieces. They complement the rustic atmosphere. Use reclaimed wood to create unique items. Simple designs work best in a cabin setting. Think about sturdy tables and comfortable chairs. A wooden bench can be a versatile addition. Decorate with cushions and throws for a cozy touch.
Maintenance Tips
Building a log cabin with hand tools is a rewarding task. Yet, keeping it in perfect shape requires regular care. Proper maintenance ensures your cabin lasts for generations. Learn how to protect your cabin from the elements and keep it strong.
Regular Inspections
Examine your cabin every few months. Check for signs of rot, mold, or insect damage. Look at the roof and foundation closely. Use a flashlight for dark corners. Inspect the logs for cracks or splits. Early detection keeps problems small.
Weatherproofing Techniques
Seal your cabin to resist water and wind. Apply a coat of high-quality sealant every year. Choose sealants that suit your climate. Consider adding a gutter system. Gutters help direct water away from the foundation. Weatherproofing protects wood from decay.
Log Replacement And Repairs
Replace damaged logs promptly. Remove rot and replace with new logs. Use hand tools to cut and fit logs. Ensure tight joints for stability. Repair minor cracks with sealant. Fill gaps with insulation material. Timely repairs prevent further damage.
Frequently Asked Questions
What Hand Tools Do I Need For A Log Cabin?
To build a log cabin, you'll need essential hand tools like axes, saws, chisels, and drills. These tools are crucial for cutting and shaping logs. Additionally, a drawknife is useful for smoothing surfaces. Ensure you have a sturdy mallet for driving pegs and a level for precision.
How Long Does It Take To Build A Cabin?
Building a log cabin with hand tools can take several months. The timeline depends on the cabin size and your experience. Small cabins might take three to six months, while larger projects could extend to a year. Planning and consistent work can help speed up the process.
Can Beginners Build A Log Cabin?
Yes, beginners can build a log cabin with dedication and research. Start with a simple design and gather the necessary tools. Learn basic carpentry skills and seek guidance from experienced builders. Patience and perseverance are key in successfully completing your cabin project.
Is Building A Log Cabin Expensive?
Building a log cabin with hand tools can be cost-effective. You save money on machinery and contractors. However, costs include purchasing quality logs, tools, and other materials. Careful budgeting and sourcing can minimize expenses, making it affordable for many.
Conclusion
Building a log cabin with hand tools is rewarding and fulfilling. Each step teaches patience and skill. Simplicity and dedication shape the process. Using hand tools connects you to nature's rhythm. The cabin becomes a personal sanctuary. A testament to hard work and perseverance.
Remember to plan carefully. Measure twice, cut once. Enjoy each moment of creation. Your efforts will result in a cozy retreat. A place to relax and unwind. Nature’s embrace and your craftsmanship unite. This journey enriches your life. A beautiful, lasting legacy.