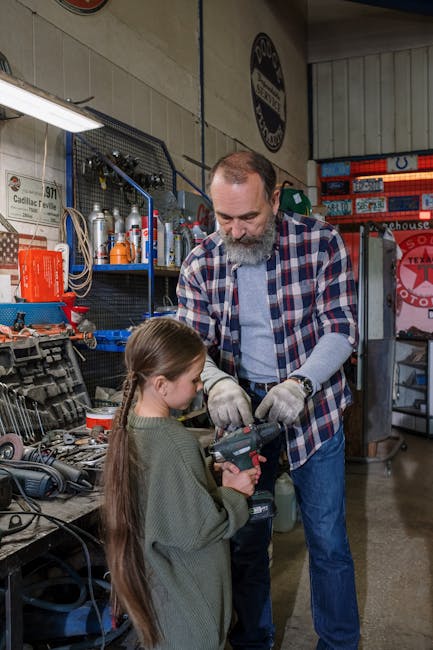
Are you tired of rummaging through a cluttered tool chest, wasting precious time searching for that one wrench or screwdriver? Imagine opening your tool chest to find everything neatly in place, ready for your next project.
Organizing a tool chest like a pro not only saves time but also boosts productivity and reduces stress. Whether you're a seasoned DIY enthusiast or just starting to build your toolkit, a well-organized tool chest is essential. In this guide, you'll discover simple yet effective strategies to transform your chaotic toolbox into an orderly haven.
Ready to unlock the secrets of tool chest organization? Let's dive in and make your workspace the envy of all your friends!
Choosing The Right Tool Chest
Organizing a tool chest like a pro begins with choosing the right compartments. Arrange tools by size and type for easy access. Label each section clearly to save time during projects.
Organizing a tool chest like a pro starts with choosing the right tool chest. This is where the magic begins. Your choice can make or break your organizing efforts. Selecting the perfect tool chest involves considering several critical factors. Understanding the material and durability, along with size and capacity, ensures that your tools are stored efficiently and safely.
Material And Durability
The material of your tool chest is a cornerstone of its longevity. A sturdy steel chest offers excellent durability, perfect for heavy-duty use. If mobility is key, a lightweight aluminum option might be more practical. Plastic chests are great for those who need a portable and affordable solution. However, they may not stand up to heavy wear and tear. Always consider the environment where you'll use the chest. Will it face harsh weather or just reside in your garage?
Size And Capacity
Size matters when it comes to tool chests. A compact chest is ideal for a small collection of tools or limited space. Larger chests, on the other hand, accommodate extensive tool collections. Consider the types of tools you own. Do you have a series of long wrenches or bulky power tools? Ensure the chest has compartments or drawers that meet your storage needs. Think about your future tool collection as well. Will you be expanding your toolset? It might be wise to select a chest with a bit more capacity than you currently need. This way, you won’t have to upgrade too soon, saving both time and money. Choosing the right tool chest is more than just a purchase; it’s an investment in your productivity and efficiency. What are the unique requirements of your tool collection? Make a list and match it against these criteria to find your perfect fit.
Categorizing Tools
Organizing a tool chest can seem daunting. But with the right approach, it becomes manageable. The key is to categorize your tools effectively. This method not only saves time but also enhances efficiency. By grouping similar tools, you streamline access and maintain order.
Hand Tools
Hand tools are essential for many tasks. Screwdrivers, hammers, and wrenches are staples in any tool chest. Group these tools together in one section. Consider using dividers or trays. This keeps them organized and easy to find. Label each area for quick identification. This minimizes search time.
Power Tools
Power tools include drills, saws, and sanders. These tools often require special storage. Separate them from hand tools. Use dedicated compartments or shelves. Ensure cords are neatly wrapped. This prevents tangling and damage. Place frequently used power tools in accessible spots. This enhances workflow efficiency.
Specialty Tools
Specialty tools cater to unique tasks. They include pliers, torque wrenches, and wire cutters. These tools need their own space. Group them by function or size. Create labeled sections for clarity. This helps in locating tools swiftly. Keep them in protective cases if necessary. This preserves their condition.
Creating A Layout Plan
Creating a layout plan for your tool chest is essential. It helps you find your tools quickly and keeps everything organized. A well-thought-out plan can save you time and frustration.
Think about how often you use certain tools. Organize them based on frequency of use to make your workflow smoother. Let's break it down further.
Frequent Use Tools
Place tools you use often within easy reach. These could be your hammer, screwdriver, or measuring tape.
Consider using a top drawer or a shelf at eye level for these items. This way, you won't waste time searching for them.
Ask yourself: What tools do you reach for most often? Keep those front and center.
Imagine working on a project and needing a tool immediately. You want it to be a quick grab, not a scavenger hunt.
Rarely Used Tools
Rarely used tools can be stored in less accessible areas. They might include specialty wrenches or rarely-used saws.
A bottom drawer or a corner section works well for these. You'll have more space for items you use daily.
Reflect on the last time you used these tools. If it's been a while, tuck them away without hesitation.
Why clutter your prime space with tools you seldom use? Prioritize your tool chest layout for efficiency.
Organizing your tool chest is not just about tidiness; it's about making your projects more enjoyable. What layout will help you work smarter?
Utilizing Dividers And Compartments
Organize tools efficiently by using dividers and compartments in your tool chest. Keep similar items together for easy access. This method saves time and reduces clutter, ensuring a tidy workspace.
Organizing a tool chest can often seem like a daunting task, especially if your tools are scattered without any system in place. Utilizing dividers and compartments is a smart approach to bring order to chaos. They help you maximize space, ensure easy access, and maintain the condition of your tools. When you have the right dividers and compartments, finding your wrench or screwdriver can feel as satisfying as meeting an old friend.
Custom Inserts
Custom inserts are a game changer for organizing a tool chest. They are tailored to fit the specific shape and size of your tools, ensuring everything has its own spot. Imagine opening your tool chest and instantly spotting that elusive socket you need—no more rummaging through piles. You can create custom foam inserts using affordable kits available online. These kits often come with pre-scored foam that you can easily cut to match your tools. It's like having a personal valet for your tools, keeping them in top condition and ready for action.
Adjustable Dividers
Adjustable dividers offer flexibility that fixed compartments simply can't match. They allow you to modify the layout of your tool chest as your collection grows or changes. This adaptability ensures you’re not stuck with a setup that no longer suits your needs. Consider dividers that can be easily moved or removed. This feature is especially useful if you acquire new tools or need to reorganize for a specific project. It’s about having a system that grows with you, without the stress of starting from scratch. Have you ever thought about using adjustable dividers to separate your frequently used tools from the ones you rarely touch? This simple strategy can save you precious time and energy. Plus, it adds a level of efficiency that can make your projects run smoother. By incorporating custom inserts and adjustable dividers, you can transform your tool chest from a cluttered mess into a well-organized powerhouse. What are you waiting for? Open that tool chest and start customizing your storage solutions today!
Labeling For Easy Access
Organizing a tool chest can save time and reduce stress. Proper labeling is key to finding tools quickly. It makes maintenance tasks smoother and more efficient. With clear, consistent labels, locating any tool becomes a breeze. This section guides you through effective labeling techniques.
Color Coding
Color coding is a simple, effective method. Assign colors to different tool categories. For instance, use red for wrenches, blue for screwdrivers. This visual cue speeds up the search process. It also helps in maintaining order within the tool chest.
Colored stickers or tape work best for this method. They are easy to apply and remove. Choose colors that stand out and are easily distinguishable. This makes the system intuitive and user-friendly.
Clear Labels
Clear labels further enhance tool organization. Use a label maker or printable labels. Ensure the text is legible and concise. Labels should include the tool name and any specific details. For example, "Phillips Screwdriver" or "Metric Wrench Set".
Position labels where they are easily visible. This eliminates the need to move tools around to read them. Consistent labeling keeps the tool chest tidy and accessible.
Regularly update labels as you add or replace tools. This ensures accuracy and avoids confusion. A well-labeled tool chest reflects a professional and organized approach.
Maintaining Order
Organizing a tool chest like a pro involves sorting tools by type and size for easy access. Use labels or color codes to identify sections. Keep frequently used tools at the top for quick retrieval.
Maintaining order in your tool chest is crucial for efficiency and peace of mind. Imagine reaching for a screwdriver and knowing exactly where it is. No more rummaging through clutter or wasting time. With a little effort and some strategic habits, you can keep your tool chest organized like a pro. Let’s dive into how regular cleaning and routine checks can make all the difference.
Regular Cleaning
Regular cleaning is the backbone of maintaining order in your tool chest. Dust and grime can accumulate quickly, making your tools less effective. A simple wipe down every week can keep things tidy. Consider using a soft cloth or brush to reach those tricky corners. How often do you clean your tool chest? If your answer is “rarely”, it’s time to rethink. Cleaning doesn’t have to be a chore. Make it a ritual. You might find it oddly satisfying to see your tools gleaming. Plus, clean tools last longer and work better.
Routine Checks
Routine checks ensure everything is in its rightful place. Set aside time each month to go through your tool chest. Check for missing tools or items that need repair. This habit prevents the chaos of searching for missing tools when you need them most. Imagine finding out a tool is broken right when you need it. Frustrating, right? Routine checks can prevent such surprises. Create a checklist of your tools and tick them off each time. This way, you can easily spot what's out of place. Think about the last time you needed a tool and couldn't find it. Did it slow down your project? Routine checks not only keep your tools in order but also ensure smooth progress in your tasks. By maintaining order through regular cleaning and routine checks, you're not just organizing your tool chest, you're enhancing your workflow and prolonging the life of your tools. Are you ready to turn chaos into order? Your organized tool chest awaits.
Safety Considerations
Organizing a tool chest safely prevents accidents and keeps tools easy to find. Arrange sharp tools securely to avoid injuries. Ensure heavy items are stored on lower shelves for stability.
When organizing a tool chest, safety should be your top priority. Properly storing and handling tools not only ensures your safety but also extends the life of your tools. Let's dive into some crucial safety considerations to keep in mind when arranging your tool chest.
Proper Storage
Proper storage is the backbone of tool chest organization. Start by categorizing your tools. Group them by type or frequency of use. This makes it easy to find what you need without rummaging through the entire chest. Consider using foam inserts or drawer liners to keep tools in place. This prevents them from shifting when you open and close drawers. I once ignored this tip and ended up with a jumbled mess, wasting precious time sorting it out. Labeling drawers is another effective strategy. Use labels that clearly identify the contents of each drawer. This small step can greatly enhance efficiency and safety. Have you ever accidentally grabbed the wrong tool because it wasn't labeled?
Safe Handling
Safe handling of tools is essential to prevent accidents. Always return tools to their designated spot after use. It reduces clutter and minimizes the risk of injury. Ensure that heavy tools are stored at waist level. This prevents strain when lifting them. I remember straining my back trying to lift a heavy wrench from a lower drawer. Lesson learned: store heavy items where they are easily accessible. Keep sharp tools covered or sheathed. This prevents accidental cuts. Use blade guards or protective covers when available. Have you ever reached into a drawer and nicked yourself on an exposed blade? A simple cover can prevent that. Finally, maintain a clean workspace. Regularly wipe down your tools and tool chest. A clean environment not only promotes safety but also extends the life of your tools. How often do you clean your tool chest? By focusing on these safety considerations, you ensure a more efficient and secure workspace. Your tools will thank you, and you'll thank yourself for the time and injuries saved.
Frequently Asked Questions
How Do I Categorize Tools In A Tool Chest?
Organize tools by type or function for easy access. Use drawers for similar items like screwdrivers, wrenches, or pliers. Label each section to quickly identify tools. Grouping by frequency of use can also enhance efficiency. Regularly update your arrangement as your tool collection grows.
What's The Best Way To Store Small Tools?
Use drawer organizers or small bins to store small tools. This prevents them from getting lost or mixed up. Label each bin or section for easy identification. Consider magnetic strips for items like drill bits and sockets. Keep frequently used small tools near the top.
How Can I Maintain Tool Chest Organization?
Regularly declutter your tool chest by removing unused tools. Clean and inspect tools for damage. Reorganize based on changing needs or new tools. Labeling and maintaining a consistent system help in staying organized. Schedule periodic checks to ensure everything remains in its place.
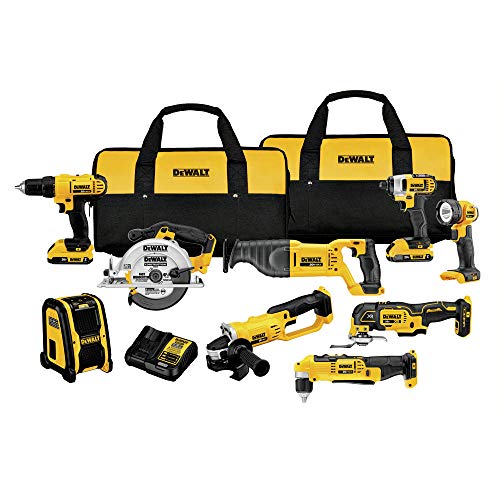
What Tools Are Essential For A Tool Chest?
Essential tools include screwdrivers, wrenches, pliers, and a hammer. Add a measuring tape, utility knife, and level. Consider including specialty tools based on your projects. Keep basic power tools like a drill. Customize your selection based on personal needs and project types.
Conclusion
Organizing a tool chest is simple with the right steps. Start by sorting tools by type and size. Use labels for quick identification. Keep frequently used tools accessible. Arrange tools neatly to save space. Regularly clean and review your setup.
This prevents clutter and ensures efficiency. A well-organized tool chest boosts productivity. It makes tasks smoother and saves time. Every tool has its place, making work enjoyable. You now have the skills to organize like a pro. Enjoy your newfound tidiness and efficiency.
Happy organizing!