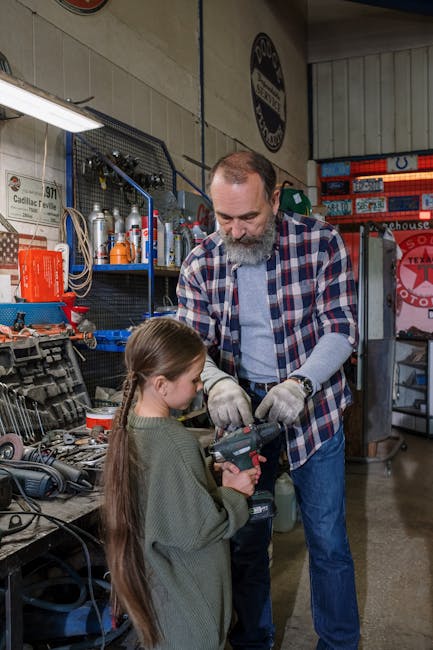
Are you tired of rummaging through your tool chest, wasting precious time trying to find that one screwdriver or wrench? Imagine how much more efficient your projects could be if your tools were neatly organized and easily accessible.
You'll discover the secrets to transforming your tool chest from a chaotic mess into a well-ordered powerhouse. We’ll guide you through simple, practical steps that will not only save you time but also reduce frustration, allowing you to focus on what you do best – getting the job done.
Ready to unlock the full potential of your tool chest and boost your productivity? Let’s dive in.
Selecting The Right Tool Chest
Organizing your tools efficiently starts with choosing the right tool chest. A well-selected tool chest not only protects your tools but also makes them easily accessible whenever you need them. Whether you're a professional mechanic or a DIY enthusiast, the right tool chest can make a world of difference in your daily routine.
Size And Capacity Considerations
Think about the number of tools you own. A compact tool chest might be tempting, but if your collection is growing, you may quickly run out of space. Consider your future needs too. Will you be adding more tools soon? A larger tool chest might be a better investment.
Assess the available space in your workshop or garage. You need enough room to open drawers fully. Measure this area before making a purchase. Matching the tool chest size with your space ensures smooth access.
Material And Durability
Your tools are valuable, and their protection is crucial. Tool chests come in various materials like steel, aluminum, and plastic. Steel offers durability and security, but it’s heavier. Aluminum is lighter yet sturdy, perfect for mobility.
Consider the environment where you'll store your tool chest. If it’s a damp garage, a rust-resistant material is essential. You want your tool chest to withstand the test of time. Investing in a durable option saves money in the long run.
Mobility And Accessibility Features
Do you often work in different locations? If yes, mobility is key. Some tool chests come with wheels and handles. These features make it easier to move your tools around without hassle.
Look for tool chests with smooth sliding drawers. Accessibility is vital when you need to grab a tool quickly. Imagine being in the middle of a project and struggling with a sticky drawer—frustrating, right?
Choosing the right tool chest involves careful thought. Reflect on your current and future needs. Are you prepared to invest in a durable, spacious, and accessible tool chest that suits your lifestyle? Make a choice that enhances your efficiency and satisfaction.
Categorizing Your Tools
Organize your tools by grouping similar items together in a tool chest. Label each section for easy access. This method saves time and reduces frustration during projects.
Organizing your tools in a tool chest doesn't just save time; it helps you work efficiently and safely. Categorizing your tools is a fundamental step in achieving this organization. If you've ever wasted precious minutes searching for a screwdriver or drill bit, you know the frustration. Let's dive into categorizing your tools for a more streamlined workspace.
Hand Tools Vs Power Tools
When organizing your tool chest, start by separating hand tools from power tools. Hand tools, like hammers and wrenches, are used frequently and should be easily accessible. You might place them in the top drawers for quick reach. Power tools, like drills and saws, tend to be bulkier. Store them in the lower sections or compartments that can accommodate their size. This separation not only optimizes space but also helps you quickly locate the right tool when needed.
Specialty Tools Grouping
Specialty tools deserve their own grouping. These are tools you might not use every day, like a torque wrench or pipe cutter. Group them together in a dedicated section of your tool chest. Label this section clearly. This helps you remember where they are when a specific job calls for them. It can be a game-changer when you're working on a project that requires precision.
Tool Usage Frequency
Consider how often you use each tool. Tools you use daily should be front and center. Think of the ones you reach for time and again—those are your priority tools. Place less frequently used tools toward the back or in harder-to-reach areas. This strategy ensures that you're not constantly rummaging through your tool chest. It also keeps your workspace tidy and efficient. How do you prioritize your tools? What is your tool chest telling you about your workflow? By categorizing your tools thoughtfully, you can transform your tool chest into a powerful asset in your DIY arsenal.
Creating A Layout Strategy
Organizing tools in a tool chest involves categorizing items by size and function for quick access. Utilize trays and labels to maintain order. Regularly assess and adjust the layout for efficiency.
Organizing tools in a tool chest efficiently can transform your workspace and boost productivity. Creating a layout strategy is crucial to ensuring that every tool is easily accessible and neatly stored. Imagine opening your tool chest and knowing exactly where to find what you need. Let's dive into how you can achieve this level of organization.
Top-down Organization
Start by considering the tools you use most frequently. These should be placed at the top, within easy reach. This strategy reduces the time spent rummaging through drawers for commonly used items. Think about your daily tasks. Which tools do you find yourself constantly reaching for? Place them where you can effortlessly grab them. This approach not only saves time but also keeps your workflow smooth.
Drawer Labeling Techniques
Labeling drawers is an underrated technique that can make a significant difference. Use clear labels that describe the contents or the type of tools inside. This simple step can prevent confusion and ensure quick access. Labels can be handwritten or printed, depending on your preference. Consider using color-coded labels for different tool categories. This adds another layer of organization and visual clarity.
Vertical Vs Horizontal Arrangement
The way you arrange tools can impact accessibility and space utilization. Decide whether vertical or horizontal arrangement suits your tools best. Vertical arrangements often work well for tools with long handles or those that stack easily. Horizontal arrangements can be ideal for flat items or small, delicate tools. Think about the nature of each tool and how it fits best. This decision can streamline the process of finding and storing your tools. Creating a layout strategy for your tool chest is about making thoughtful decisions that align with your workflow. What changes can you make today to enhance your tool organization? Implement these strategies and notice the difference in efficiency and ease.
Utilizing Tool Dividers And Inserts
Tool dividers and inserts help in keeping a tool chest tidy. They separate tools into sections, making it easy to find what you need. This organization saves time and reduces frustration.
Organizing tools in a tool chest can be a game-changer for your productivity and efficiency. An orderly tool chest helps you find the right tool at the right time, saving you from the frustration of rummaging through a chaotic mess. Utilizing tool dividers and inserts is a smart strategy to maximize space and maintain order. Let's dive into how customizable dividers, foam inserts, and modular systems can transform your tool chest into a well-organized haven.
Customizable Dividers
Customizable dividers give you the flexibility to arrange your tools according to your specific needs. You can adjust these dividers to fit various sizes, ensuring each tool has its own designated space. This means no more clattering sounds when you open your tool chest. Consider the last time you spent minutes searching for a specific screwdriver. With customizable dividers, you can create a dedicated slot just for your screwdrivers, making them easily accessible. It's all about making your tool chest work for you, not against you.
Foam Inserts For Delicate Tools
Foam inserts provide a cushioned home for your delicate tools, protecting them from damage. If you've ever had a tool break because it was jostled around, you'll appreciate the secure fit foam inserts offer. These inserts can be cut to size, snugly holding tools like calipers, micrometers, or precision screwdrivers. The peace of mind knowing that your delicate tools are safe is worth the effort of customizing foam inserts.
Benefits Of Modular Systems
Modular systems are perfect for those who love to personalize their tool organization. These systems allow you to build a layout that suits your workflow, offering endless possibilities for tool arrangement. Imagine needing to add a new set of pliers to your collection. With a modular system, you can easily adjust your setup without having to start from scratch. This adaptability is crucial for maintaining an organized space as your tool collection grows. What’s your current tool organization strategy? Consider how these dividers and inserts can improve your setup. A little effort in organizing can lead to a big payoff in productivity.
Maintaining Tool Order
Keeping your tool chest organized boosts efficiency and saves time. Maintaining order ensures tools are easy to find, reducing work interruptions. A well-maintained tool chest also extends the lifespan of your tools.
Regular Clean-up Practices
Dedicate time weekly to clean your tool chest. Remove dust and debris from tools and compartments. Clean tools function better and last longer. Use a dry cloth or mild cleaner for delicate tools. Regular cleaning also helps spot any damaged tools early.
Inventory Checks
Conduct inventory checks monthly. Keep a list of all tools in your chest. This helps track missing or misplaced items. Use a simple spreadsheet or a notebook. Regular checks ensure you always know what tools you have.
Adjusting Layout For New Tools
Acquire new tools? Adjust your layout to accommodate them. Avoid cramming new tools into existing spaces. Reorganize your chest for easy access. Group similar tools together for better efficiency. This keeps your tool chest functional and tidy.
Safety And Security Measures
Organizing tools in a tool chest ensures safety and security. Proper placement prevents accidents and keeps tools in good condition. Labeling drawers helps locate items quickly, saving time and reducing risk.
Organizing your tools in a tool chest is more than just about keeping things tidy. It's crucial to ensure safety and security. When tools are properly stored, accidents are less likely, and your investment is protected. Let's dive into some essential safety and security measures you should consider.
Locking Mechanisms
A reliable locking mechanism is your first line of defense. Choose a tool chest with a sturdy lock to deter theft and prevent unauthorized access. Think about the peace of mind you'll have knowing your expensive power tools are secure. Some tool chests even offer digital locks. They add an extra layer of security without the hassle of keys.
Protective Covers
Protective covers shield your tools from dust, moisture, and accidental spills. These covers can extend the life of your tools by preventing rust and corrosion. Consider using a durable, water-resistant cover for your tool chest. It’s a small investment that can save you from costly repairs and replacements.
Monitoring Access
Who has access to your tool chest? It’s a question worth pondering. Keep a record of who borrows tools and when they return them. You might think it’s overkill, but it's a simple way to keep track of your tools. This habit can prevent tools from mysteriously disappearing. Install a camera in your garage or workspace. It adds an extra layer of security and accountability. Plus, it might give you a good laugh watching your cat's antics when you’re not around! Taking these steps can make a significant difference in safeguarding your tools. How will you enhance the safety and security of your tool chest today?
Maximizing Space Efficiency
Efficiently organizing tools in a tool chest enhances space usage. Arrange items by type and size for easy access. Use labeled compartments to categorize tools, reducing clutter and saving time.
Maximizing space efficiency in your tool chest can transform a chaotic workspace into a well-organized haven. Imagine opening your tool chest and immediately finding the exact tool you need. Not only does this save you time, but it also enhances your productivity by keeping you focused on the task at hand. Let’s dive into some practical tips to help you make the most of your tool chest space.
Space-saving Techniques
Start by grouping similar tools together. This helps in keeping track of your tools and prevents clutter. Consider using drawer dividers or foam organizers to create designated spots for each tool type. This simple step ensures that every inch of your tool chest is utilized effectively. Think about the size and shape of your tools. Place larger, less frequently used items at the bottom or back of the chest. Reserve front spaces for tools you use daily. This arrangement not only maximizes space but also ensures ease of access.
Stacking And Nesting Tools
Stacking and nesting tools can create additional space in your tool chest. You can stack flat tools like wrenches and screwdrivers on top of each other, using foam or rubber separators to prevent damage. This method not only conserves space but also keeps your tools secure. For tools that nest, such as sockets or bits, use a nesting tray. This keeps them organized and easily accessible. Consider marking these trays with labels to quickly identify the tool sizes. This is a game-changer when you're in the middle of a project and need to find the right size quickly.
Utilizing Wall Space
Have you considered using the walls of your tool chest? Magnetic strips or pegboards can be attached to the interior walls to hold metal tools like pliers and scissors. This frees up drawer space and keeps these tools visible and within reach. Think outside the box and use adhesive hooks for hanging smaller tools or accessories. This method is perfect for items that don't fit neatly into drawers. Your tool chest walls can become valuable real estate for extra storage. What clever solutions have you come up with to keep your tools organized? Share your tips and tricks in the comments below! By maximizing your tool chest's space efficiency, you not only enhance your workflow but also prolong the life of your tools.
Expert Tips And Tricks
Organizing tools in a tool chest might seem simple. Yet, it requires some skill and strategy. Experts often share valuable tips to make this task easier. A well-organized tool chest saves time and reduces frustration. It also ensures the longevity of your tools.
Avoiding Common Mistakes
Many people overfill their tool chests. This can lead to clutter and chaos. Keep only essential tools inside. Label each drawer for easy access. Avoid mixing different tools in one compartment. This prevents damage and makes retrieval quicker. Regularly clean your tool chest to avoid rust.
Personalizing Your Setup
Everyone has unique needs. Customize your tool chest based on your projects. Arrange tools by frequency of use. Place frequently used tools in easy-to-reach spots. Use foam inserts to create custom slots. This keeps tools from shifting during movement. Personal touches make your tool chest truly yours.
Leveraging Technology
Technology offers smart solutions for organization. Use magnetic strips for metal tools. Install LED lights in drawers for better visibility. Consider tool tracking apps to monitor inventory. These tools help in efficient organization. They also ensure you never misplace a tool again.
Frequently Asked Questions
How Do I Categorize Tools In A Tool Chest?
Categorizing tools in a tool chest involves grouping them by type and function. Use dividers to separate hand tools, power tools, and accessories. Label each section for easy identification. This organization method helps you quickly find the tool you need, saving time and reducing clutter.
What Is The Best Way To Store Small Tools?
Store small tools in dedicated trays or drawers within the tool chest. Use foam inserts or magnetic strips to keep them secure. Organize them by size or purpose for quick access. This method prevents tools from getting lost or damaged, ensuring a tidy and efficient workspace.
How Can I Maximize Tool Chest Space?
Maximize tool chest space by using vertical storage solutions and stacking trays. Keep frequently used tools at the top for easy access. Utilize drawer organizers and pegboards for small items. Regularly declutter and remove unnecessary tools to maintain an organized and efficient tool chest.
Should I Label Tool Chest Compartments?
Labeling tool chest compartments is highly recommended for efficient organization. Use clear labels or color-coded tags for easy identification. This helps quickly locate tools and ensures they are returned to the correct place. Labels also facilitate a systematic arrangement, saving time during projects.
Conclusion
Organizing your tool chest makes work easier. Everything has its place. This setup saves time. You don’t search for tools. Less mess, more efficiency. Use foam inserts for protection. Labels help identify tools quickly. Group tools by type or frequency of use.
Regularly clean and maintain your tool chest. This ensures long-lasting organization. A tidy tool chest boosts productivity. You’ll work smarter, not harder. Try these tips and enjoy a clutter-free workspace. Happy organizing!