Imagine waking up to the enticing aroma of freshly brewed coffee, only to discover that your Keurig is not cooperating. You press the button, but instead of a steaming cup, you get a mere trickle or nothing at all.
Frustrating, right? Before you dash out the door to buy a new one or frantically search for specialized tools, take a deep breath. You might not realize it, but the solution is simpler than you think and doesn’t require any fancy gadgets.
In this guide, you'll learn how to perform needle maintenance on your Keurig without needing any tools. This easy-to-follow method will not only save you time and money but will also ensure your coffee maker performs at its best. Imagine having your coffee maker back in top shape with just a few simple steps. Get ready to rediscover the joy of perfectly brewed coffee every morning, without the hassle. Dive in, because your Keurig deserves a little TLC, and so do you.
Gathering Supplies
Gathering supplies for needle maintenance on a Keurig is simple. Use a paperclip to clean the needle. Carefully insert it into the needle to remove clogs. Regular cleaning ensures better coffee flow.
Are you ready to breathe new life into your Keurig? Before jumping into the needle maintenance process, gathering the right supplies is essential. You might be surprised to learn that you can perform this task without any fancy tools, just using items you already have at home. Imagine the satisfaction of a perfectly brewed cup of coffee, achieved by your own hands. Let's dive into what you'll need.
Essential Tools
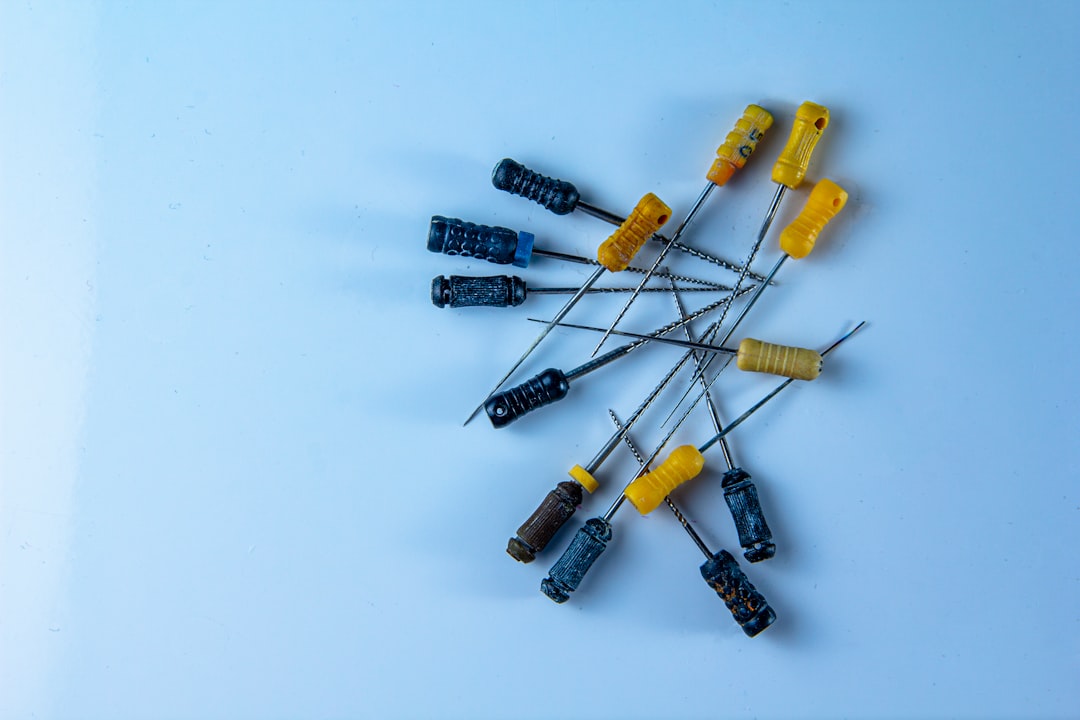
You might think that needle maintenance requires specialized equipment, but that's not the case. For this task, all you need is your trusty paperclip. Yes, the same paperclip you use to keep your documents tidy. Straighten it out, and you have a simple yet effective tool to tackle those clogged needles. Have you ever used a paperclip for anything other than its intended purpose? It’s surprisingly versatile, and in this case, it’s your key to a cleaner Keurig.
Cleaning Materials
Beyond the paperclip, gather some common household items. You’ll need a soft cloth and a bowl of warm water. These will help in wiping away coffee residue and ensuring the machine's needles are free from any blockage. Think about the last time you cleaned your kitchen. Using warm water and a cloth is an age-old trick that works wonders, and your Keurig deserves the same care. Additionally, grab a small brush, like a toothbrush. This will help scrub areas that are hard to reach. Do you have an old toothbrush lying around? Give it a new purpose and watch how effectively it cleans those stubborn spots. As you prepare these supplies, consider this: how often do you clean your coffee maker? Regular maintenance can extend its life and improve your coffee experience. Gathering supplies is not just a mundane step; it's the foundation of successful needle maintenance. Are you ready to transform your coffee-making routine with these simple items?
Preparing The Keurig
Needle maintenance on a Keurig can be easy without tools. Use a paper clip to clean the needle gently. This simple method clears clogs, ensuring a smooth brew every time.
Getting your Keurig ready for needle maintenance might seem like an intimidating task, but it's easier than you think. No need for fancy tools or expert skills—just a bit of preparation and you'll be good to go. Taking a few minutes to set up properly can save you from potential mishaps and ensure your coffee maker runs smoothly. Ever found yourself rushing through things only to wish you’d taken your time? Let's avoid that situation here. By carefully following these steps, you'll be performing needle maintenance like a pro.
Power Down And Unplug
Before doing anything, ensure your Keurig is turned off. Reach for the power button and press it firmly. Safety comes first, right? Unplugging the machine is crucial. This simple step can prevent any electrical accidents while you're working on it. Feel more secure knowing that your Keurig is powered down. It’s a small action with significant impact.
Remove Water Reservoir
Now, let’s focus on the water reservoir. Carefully lift the reservoir off the machine. You might wonder why this is important. Removing the reservoir helps you access the inner parts better. Remember the first time you cleaned behind your fridge and found all sorts of things? The same principle applies here. With the reservoir removed, you’ll have a clear view to address any hidden issues. How often do we overlook the importance of such small details? Here’s your chance to make a habit out of preparation. Have you ever discovered something unexpected while cleaning? Share your story in the comments and join the conversation.
Accessing The Needles
Maintaining the needles on a Keurig can be done without tools. Simply unplug the machine and remove the pod holder. Use a paper clip to gently clean the needle by inserting it into the needle's hole. This method ensures your Keurig continues to brew perfectly.
Accessing the needles in your Keurig brewer is a crucial step for maintaining optimal performance. Often overlooked, this simple task can enhance the quality of your coffee and extend the life of your machine. You might think you need special tools, but with a bit of knowledge, you can clean those needles without anything extra. Imagine brewing a cup without any clogs or interruptions. It's possible, and it starts here.
Open The Brewer Head
Begin by ensuring your Keurig is turned off and unplugged. This not only protects you but also keeps the machine safe from electrical mishaps. Once you're ready, lift the brewer head as if you were inserting a new pod. This action exposes the inner workings where the magic happens. Have you ever peeked inside and wondered what's going on? There's a whole world in there, and by opening the brewer head, you’re taking the first step towards understanding it.
Locate The Needles
Now that the brewer head is open, it's time to locate the needles. These are tiny, but mighty components that puncture the coffee pods. Look closely, and you'll see them positioned at the top and bottom inside the housing. Did you know these needles are pivotal for a smooth coffee flow? Think of them as the gatekeepers of your brew. If they’re clogged, your coffee won’t brew properly. As you examine these needles, consider this: how often do you clean them? Regular maintenance can prevent blockages and ensure every cup is as delicious as the last. Engage with your Keurig actively, and it will serve you well. Accessing the needles is simpler than you think, and the rewards are undeniable. Give it a try—your next cup of coffee will thank you.
Cleaning The Entrance Needle
Maintaining your Keurig is simple. Clean the entrance needle with a paperclip to ensure smooth coffee flow. This quick task keeps your machine working efficiently, reducing clogs and improving performance. Regular maintenance helps maintain coffee quality.
Cleaning the entrance needle of your Keurig can make a world of difference in the taste and efficiency of your brewing experience. You might wonder why your coffee suddenly tastes off or why your machine seems to be working harder than usual. The entrance needle, responsible for puncturing the K-Cup, can accumulate coffee grounds and debris over time, leading to these issues. Fortunately, you can clean it without any fancy tools, using items you likely have at home. Ready to give your Keurig the TLC it deserves? Let’s dive into the specifics.
Use A Paper Clip
You don't need specialized equipment to clean the entrance needle; a simple paper clip will do the trick. Straighten the paper clip to create a long, thin cleaning tool. Carefully insert the paper clip into the needle’s opening, gently maneuvering it to dislodge any stuck coffee grounds. You might be surprised at how much debris can accumulate in such a tiny space. Remember to be gentle—aggressive poking might damage the needle. It's all about patience and precision here.
Flush With Water
After cleaning with a paper clip, it's time to flush out any remaining residue with water. Fill the water reservoir and run a few brew cycles without a K-Cup. This helps rinse out lingering particles. You might notice bits of coffee grounds coming out during the first cycle. If so, repeat the process until the water runs clear. Ask yourself: When was the last time you gave your Keurig a thorough clean? Regular flushing can keep your coffee tasting fresh and your machine running smoothly. Cleaning the entrance needle is a simple task that can enhance your coffee experience significantly. With just a paper clip and some water, you can ensure your Keurig remains in top condition—no toolkit required.
Cleaning The Exit Needle
Cleaning the exit needle on your Keurig keeps your coffee flowing smoothly. Remove the pod holder and gently wipe the needle with a damp cloth. Regular maintenance prevents clogs and ensures a perfect brew every time.
If you've ever had your morning routine disrupted by a sluggish Keurig, you know how frustrating it can be. A common culprit is a clogged exit needle. Cleaning it is a straightforward task that doesn't require fancy tools. This guide will help you keep your Keurig in top shape, ensuring every cup of coffee is as delightful as it should be.
Disassemble The Pod Holder
Start by unplugging your Keurig to ensure safety. Next, remove the pod holder from the machine. This part holds the coffee pod during brewing and is essential for accessing the exit needle. Gently push up from underneath the pod holder to release it. You’ll notice it’s made up of several parts—keep them together to avoid losing any pieces. Once disassembled, you'll have a clear view of the exit needle, which is the small, sharp component at the bottom.
Clear Blockages
Now that you have access to the needle, it's time to clear any blockages. Use a straightened paper clip or a similar object to gently poke through the exit needle. Be careful not to apply too much force, as this could damage it. Rotate the paper clip to dislodge any coffee grounds or debris. You may be surprised at how much accumulates there over time. Rinse the pod holder parts in warm, soapy water to remove any remaining residue. Once cleaned, reassemble the pod holder and place it back in your Keurig. Plug the machine back in and run a water-only cycle to ensure everything is functioning smoothly. Regular maintenance like this can save you time and money. Plus, it gives you the satisfaction of knowing your coffee maker is in great condition. Have you ever thought about how a simple cleaning task can bring back the joy of your perfect morning brew?
Reassembling The Keurig
Easily clean your Keurig needle without any tools. Unplug the machine. Open the lid and remove the pod holder. Carefully wipe the needle with a damp cloth to remove any coffee residue. Reassemble and enjoy fresh coffee.
Reassembling your Keurig after performing needle maintenance without tools might seem daunting, but it's easier than you think. With just a few steps, you can have your coffee maker ready to brew your next cup. Remember, the process is as crucial as the maintenance itself, ensuring your machine functions seamlessly.
Secure Pod Holder
Start by carefully placing the pod holder back into its original position. Ensure that it snaps firmly into place. You should hear a clicking sound when it’s properly secured. If you've ever felt the frustration of a misaligned pod, you'll know why this step is vital. A correctly placed pod holder ensures your coffee grounds don’t spill, offering a smooth brewing experience. Have you ever had a morning ruined by coffee grounds in your cup? Securing the pod holder can help prevent that.
Attach Water Reservoir
Next, position the water reservoir back onto the machine. Align it correctly with the base to avoid any leaks. You should feel it fit snugly against the Keurig. It's a straightforward task, yet essential for optimal performance. A properly attached reservoir means your machine can draw water efficiently. This way, you won’t have to deal with surprise interruptions mid-brew. Have you noticed any dripping or water pooling? Reattaching the reservoir correctly can often solve these issues. By taking the time to reassemble your Keurig correctly, you ensure it’s ready to deliver that perfect cup every time. Isn’t a hassle-free coffee experience worth a few extra moments?
Testing The Machine
Cleaning your Keurig's needle without tools is simple. First, unplug the machine. Then, open the lid and carefully remove any debris with a paperclip. Regular maintenance ensures smooth coffee brewing.
Testing your Keurig is crucial after needle maintenance. This ensures the machine works properly. You don't need any tools for this part. It's a simple process. Let's make sure your Keurig brews perfectly.
Run A Water Brew
Start by filling the water reservoir. Use clean, fresh water. Place a mug on the drip tray. Turn on the machine. Select the largest cup size. Press the brew button. Wait for the cycle to complete. This clears any debris from the needle. Watch the flow of water. It should be steady and uninterrupted. If it sputters or stops, repeat the process.
Check For Leaks
After running a water brew, check your machine. Look around the base and water reservoir. Ensure there are no leaks. Leaks can indicate issues with the needle or seals. Examine the drip tray too. If you find water outside the mug, inspect the needle area again. Make adjustments if needed. Ensure everything is securely in place. Proper needle maintenance often resolves leaks. Keep your Keurig dry and clean. This prolongs its life.
Frequently Asked Questions
How To Clean Keurig Needle Without Tools?
To clean your Keurig needle without tools, use a paperclip. Unplug the machine, open the pod holder, and remove any pod. Insert a straightened paperclip into the needle holes to dislodge debris. Rinse with water, then reassemble and run a water-only brew cycle to ensure cleanliness.
Can Paperclip Effectively Clean Keurig Needle?
Yes, a paperclip is effective for cleaning a Keurig needle. Straighten it and carefully insert it into the needle holes to remove clogs. This method is simple, tool-free, and helps maintain optimal coffee flow. Always ensure your machine is unplugged during this process for safety.
Why Is Keurig Needle Maintenance Important?
Keurig needle maintenance is crucial for optimal performance. Regular cleaning prevents clogs, ensuring consistent coffee flow and taste. Neglecting maintenance can lead to slow brewing, weak coffee, or machine damage. Keeping the needle clean also extends the machine's lifespan, providing you with a better coffee experience.
How Often Should You Clean Keurig Needle?
Clean your Keurig needle every month for optimal performance. If you use it daily, consider more frequent cleaning, especially if noticing slow brewing or weak coffee. Regular maintenance prevents clogs and ensures a consistent coffee experience, keeping your machine in top condition.
Conclusion
Maintaining your Keurig needle is simple and tool-free. Regular cleaning ensures a smooth brewing process. Prevent clogging by using a paperclip to clear the needle. This keeps your machine running efficiently and your coffee tasting great. Remember to unplug your machine before starting.
Consistency in maintenance can extend your Keurig's life. Enjoy hassle-free mornings with a well-cared-for coffee maker. Follow these steps regularly for the best results. Keep your Keurig performing at its best with these easy tips. Happy brewing!