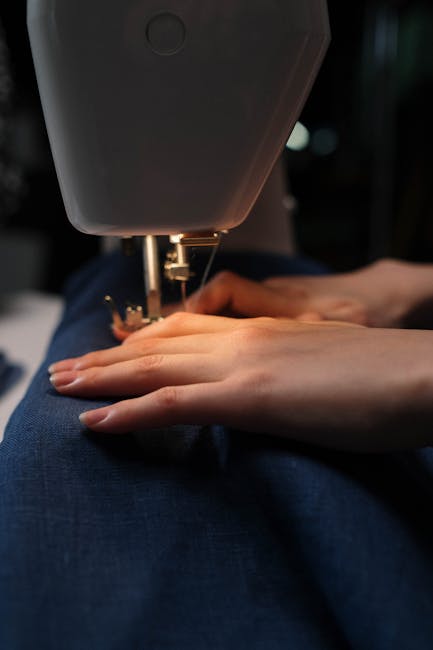
Have you ever found yourself staring at a loose button or a frayed hem, feeling helpless because you don't know how to fix it? You're not alone.
Many people feel overwhelmed when it comes to sewing by hand, but it doesn't have to be that way. Imagine the satisfaction of repairing your clothes with ease, saving both time and money. You'll discover the secrets of using a hand sewing tool effectively.
Whether you're a complete beginner or just looking to brush up on your skills, this guide will empower you to tackle those small sewing tasks with confidence. Get ready to unlock a skill that not only enhances your wardrobe but also boosts your self-sufficiency. Stay with us, and you'll soon see how simple and rewarding hand sewing can be.
Types Of Hand Sewing Tools
Hand sewing is a timeless craft that requires the right tools. Understanding the types of hand sewing tools helps enhance your sewing experience. This section explores the essential tools every sewing enthusiast should know about.
Needles And Their Uses
Needles come in various sizes and types. Each serves a specific purpose. Sharp needles are perfect for delicate fabrics. Ballpoint needles suit knit fabrics. Embroidery needles have larger eyes for thicker threads. Choose the needle based on your fabric and project.
Threads And Materials
Threads vary in material and thickness. Cotton thread is versatile and works with most fabrics. Polyester thread offers strength and stretch. Silk thread is ideal for luxurious fabrics. Choose the right thread to match your fabric and project needs.
Thimbles And Finger Protection
Thimbles protect your fingers while sewing. Made of metal, plastic, or leather, they fit snugly on your finger. Choose a thimble that feels comfortable. Finger guards offer additional protection. They prevent needle pricks and make sewing safer.
Scissors And Cutting Tools
Good scissors are essential for clean cuts. Fabric scissors have sharp blades for precise cutting. Thread snips are handy for trimming threads. Rotary cutters are great for straight lines. Always keep your cutting tools sharp for best results.
Basic Stitching Techniques
Learning basic stitching techniques can transform your sewing skills. With just a few techniques, you can create beautiful and durable projects. These fundamental stitches form the foundation for many sewing tasks. They are simple to learn and apply. Let's explore some essential hand sewing techniques.
Running Stitch
The running stitch is a straight stitch. It is often used for gathering fabric or joining layers. To start, thread your needle and knot the end. Push the needle in and out of the fabric. Aim for even, small stitches. This stitch is quick and easy. It is ideal for basting or temporary seams.
Backstitch
The backstitch is very strong. It is perfect for seams that need durability. Start with a small stitch forward. Then, bring the needle back and stitch over the first stitch. Continue by moving forward and back. Each stitch overlaps the previous one. This stitch creates a solid line of stitching.
Overcast Stitch
The overcast stitch finishes raw edges. It prevents fraying. Begin by threading your needle. Knot the end securely. Bring the needle through the fabric edge. Loop the thread over the edge and repeat. This creates a series of loops. It keeps the fabric neat and tidy.
Whip Stitch
The whip stitch joins two edges together. It is often used for hemming. Start by threading your needle and knotting the end. Hold the fabric edges together. Push the needle through both layers. Bring the needle back over the edge. Repeat this process along the seam. The stitch forms a spiral pattern.
Advanced Stitching Skills
Advanced stitching skills elevate your sewing projects to new heights. Mastery of these techniques adds intricate details and enhances overall design. With practice, your hand-sewing projects will become more refined and visually appealing.
French Knot
The French knot is a decorative stitch. It creates small, textured dots on fabric. Begin by bringing your needle up through the fabric. Wrap the thread around the needle twice. Insert the needle back into the fabric near the starting point. Pull the thread tight to form a knot. Practice makes perfect with this stitch.
Satin Stitch
The satin stitch fills areas with smooth, solid color. Start by outlining the area to be filled. Bring the needle up at one side of the outline. Insert it on the opposite side, keeping stitches close together. Repeat until the area is filled. Ensure even tension for a polished look.
Chain Stitch
The chain stitch forms a series of loops resembling chains. Begin by bringing your needle up through the fabric. Form a loop with the thread. Insert the needle back into the starting point. Bring it up again through the loop to form the chain. Pull gently to tighten each loop. This stitch adds texture and flair.
Embroidery Techniques
Embroidery techniques bring creative patterns to life. Combine stitches for unique designs. Experiment with colors and thread types. Start with simple patterns before tackling complex designs. Each stitch adds personality and detail. Embroidery elevates fabric from simple to stunning.
Care And Maintenance
Proper care and maintenance of hand sewing tools are essential. They prolong the life of your tools. They also ensure efficient sewing. By regularly cleaning, sharpening, and replacing parts, you keep your tools in top condition. This guide will help you understand how to care for your sewing tools.
Cleaning And Storing Tools
Dust and dirt can damage your sewing tools. Clean them after each use. Use a soft cloth to wipe away dust. For stubborn dirt, dampen the cloth slightly. Always dry your tools before storing.
Store tools in a cool, dry place. Avoid moisture as it leads to rust. Use a toolbox or a sewing kit for storage. This keeps tools organized and safe.
Sharpening Techniques
Sharp tools make sewing easier. Scissors and needles need regular sharpening. Use a sharpening stone for scissors. Hold the blade at a slight angle. Slide it over the stone carefully.
For needles, use a needle sharpener. Insert the needle and twist gently. This keeps your needles sharp and efficient.
Replacing Parts
Some parts of sewing tools wear out over time. Replace these parts to maintain tool performance. Check handles of seam rippers and scissors. If they become loose, replace them.
Also, check for bent or dull needles. Replace them to avoid fabric damage. Regular maintenance ensures smooth sewing sessions.
Common Mistakes To Avoid
Avoid pulling the thread too tightly. This can cause fabric puckering. Use the right needle for your fabric. Choosing the wrong size can damage the material. Always knot the thread securely to prevent unraveling.
When you're learning to sew by hand, understanding what not to do is just as important as knowing the right steps. Avoiding common mistakes can save you time and frustration. Let's dive into some typical errors you might encounter and how to steer clear of them.
Incorrect Needle Usage
Choosing the wrong needle can make your sewing experience difficult. If the needle is too thick, it might leave holes in delicate fabric. On the other hand, a too-thin needle may bend or break on heavier materials. Match your needle to the fabric you're working with. For instance, a sharp needle works best for woven fabrics, while a ballpoint needle is ideal for knits. This simple adjustment can improve your sewing dramatically. Have you checked your needle size lately?
Poor Thread Tension
Thread tension can make or break your sewing project. If it's too tight, your fabric may pucker. Too loose, and the stitches might not hold. Experiment with different thread tensions on a scrap piece of fabric. You’ll quickly see the difference between tight and loose tension. Adjust until the thread lies flat without pulling the fabric. How often do you test your tension before starting a project?
Uneven Stitches
Uneven stitches can ruin the appearance of your work. They may occur if you're not maintaining a consistent hand movement or if you're distracted. Practice keeping your stitches the same length. You might find using a guide helpful, like marking the fabric with a light pencil line. This will train your hand to move smoothly and consistently. Do you find your stitches vary when you're in a hurry? Avoiding these mistakes can enhance your hand sewing skills significantly. Each small improvement leads to better, more professional results. Next time you pick up a needle and thread, remember these tips and watch your sewing transform.
Tips For Mastering Sewing Skills
Discover the basics of using a hand sewing tool with ease. Start by threading the needle carefully. Practice straight stitches on simple fabrics to build confidence and precision.
Mastering the art of hand sewing is a rewarding journey that requires patience and practice. Whether you're a complete beginner or someone looking to refine your skills, there are several effective strategies to help you improve. From setting aside time for regular practice to engaging with fellow sewing enthusiasts, these tips will guide you on your path to becoming a skilled hand sewer.
Practice Regularly
Regular practice is essential in developing any skill, and sewing is no exception. Dedicate a specific time each week to your sewing projects. This consistency helps you build muscle memory, making your stitches more even and precise over time. Start with simple projects and gradually increase their complexity. Making small items like handkerchiefs or cushion covers is a great way to get the hang of basic stitches. Have you noticed how athletes practice daily to stay sharp? Treat your sewing sessions the same way to see steady improvement.
Experiment With Different Fabrics
Working with a variety of fabrics can significantly enhance your sewing skills. Each fabric behaves differently, presenting unique challenges and learning opportunities. Trying your hand at cotton, silk, or denim will teach you about tension, stitch length, and needle selection. Don't be afraid to make mistakes. Every error is a lesson in disguise. Keep scraps of different materials and test your stitches on them before starting a new project. This experimentation will not only improve your technique but also boost your confidence.
Join Sewing Communities
Connecting with other sewing enthusiasts can be incredibly beneficial. Joining sewing groups, either online or in person, provides you with a support system. It's a place to share your projects, ask questions, and get feedback from experienced sewers. These communities are treasure troves of tips and tricks. You might learn about a stitch you've never tried or discover a new tool that makes your sewing easier. Have you ever thought about how shared experiences can accelerate learning? Engaging with these communities can be a game-changer in your sewing journey. By applying these tips, you'll find your hand sewing skills improving steadily. Remember, every stitch you make is a step forward in your creative journey. Keep practicing, experimenting, and connecting with others to refine your craft.
Frequently Asked Questions
What Is A Hand Sewing Tool?
A hand sewing tool is a device used for stitching fabric manually. It includes needles, thimbles, and threaders. These tools are essential for detailed sewing tasks. They're perfect for repairs, crafting, and decorative stitching. Hand sewing tools are portable and easy to use.
How Do You Thread A Hand Sewing Needle?
To thread a hand sewing needle, cut a piece of thread. Hold the needle and insert the thread through the eye. Use a needle threader if needed. Knot the end of the thread for security. Ensure the thread is smooth and untangled.
What Are Common Hand Sewing Techniques?
Common hand sewing techniques include running stitch, backstitch, and whipstitch. Running stitch is simple and fast for seams. Backstitch is strong and durable for repairs. Whipstitch is ideal for hemming edges. Each technique serves a specific purpose in sewing.
Why Use A Thimble In Hand Sewing?
A thimble protects your finger while pushing the needle through fabric. It prevents needle pricks and offers better control. Thimbles are typically made of metal, plastic, or leather. They're especially useful when sewing thick materials or heavy fabrics.
Conclusion
Mastering the hand sewing tool enhances your creativity and skills. With practice, you can easily mend clothes or create new items. Remember to keep your tools organized and accessible. Start with simple projects to build confidence. Over time, your precision will improve.
This tool offers a rewarding and mindful experience. Enjoy the journey of crafting with your hands. Hand sewing connects you to tradition and self-expression. Keep exploring, learning, and creating. Soon, you'll find endless possibilities with this humble tool. Happy sewing!